
How to Get Rid of Spider Mites on Houseplants: The Complete Elimination Guide
Tags: how to get rid of spider mites on houseplants, how to prevent spider mites indoors, neem oil spider mites, spider mites houseplants treatment, spider mites signs on plants, spider mites vs other pests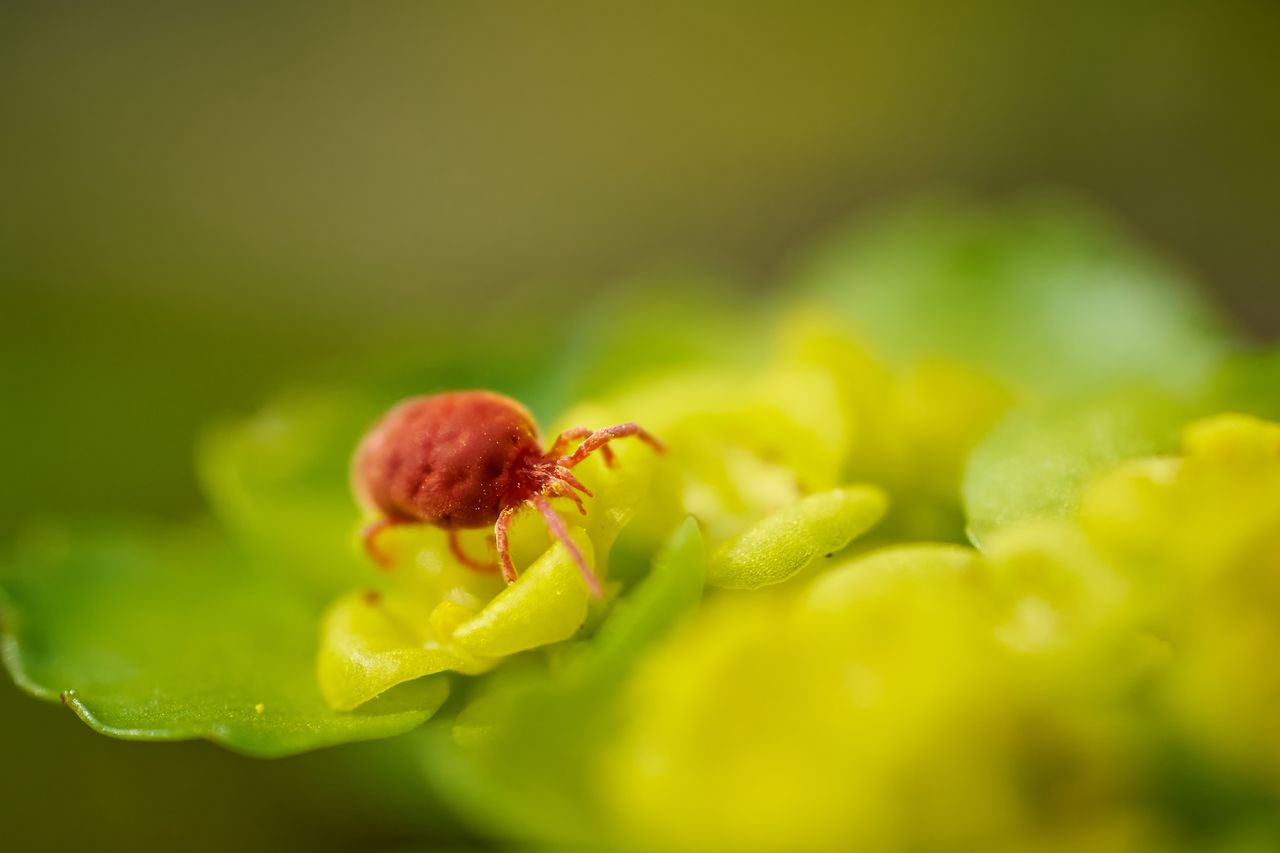
You notice something is wrong, but you can’t quite see it. The leaves look dusty. The color seems off — tiny pale yellow or white stippled dots covering the surface where rich green used to be. Then you look closer, tilt the leaf, and see the fine webbing. Translucent, almost invisible threads stretched between stems and leaf undersides. And if you look even closer — tiny moving specks, barely visible to the naked eye.
Spider mites. The most damaging houseplant pest in America, responsible for more plant deaths than any other insect-class threat. And uniquely difficult to eliminate because they are not actually insects at all.
This guide gives you everything you need to correctly identify spider mites, understand why they’re so hard to kill, and execute a treatment protocol that actually eliminates them rather than simply suppressing them temporarily — plus the prevention habits that keep them from coming back.
Table of Contents
- What Are Spider Mites? Why They’re Harder to Kill Than Insects
- How to Identify Spider Mites (vs. Other Common Pests)
- Which Plants Are Most Vulnerable
- The Spider Mite Lifecycle — Why This Determines Treatment
- The Complete Elimination Protocol (5-Step System)
- Step 1: Isolate Immediately
- Step 2: Physical Removal — The Underrated First Step
- Step 3: Chemical & Biological Treatments (What Actually Works)
- Step 4: Environmental Control
- Step 5: Ongoing Monitoring & Prevention
- Treatment Comparison Chart
- Frequently Asked Questions
1. What Are Spider Mites? Why They’re Harder to Kill Than Insects
Spider mites (Tetranychus urticae and related species) are arachnids — closer relatives of spiders and ticks than of insects. This distinction matters enormously for treatment: most general-purpose insecticides have zero effect on spider mites. Products labeled for aphids, fungus gnats, or general “insects” will not kill spider mites, which is one of the most common reasons people try to treat an infestation and fail.
You need a miticide — a product specifically effective against mites — or a treatment that works through physical mechanisms (smothering, desiccation) rather than insect-specific chemistry.
Why Spider Mites Are Particularly Dangerous to Houseplants
Speed of reproduction: Under warm indoor conditions (70–80°F — standard American home temperatures), a female spider mite can complete her development from egg to egg-laying adult in as little as 5–7 days. A single female can lay up to 200 eggs over her lifetime. A small initial infestation can expand to cover an entire plant within 2–3 weeks if untreated.
Feeding damage: Spider mites pierce individual plant cells and drain their contents — a feeding method called cell content feeding. Each mite is tiny, but the collective damage of thousands feeding simultaneously removes chlorophyll, destroys cell structure, and eventually kills leaf tissue. Heavy infestations can defoliate a large plant within weeks.
Pesticide resistance: Spider mites develop resistance to chemical treatments faster than almost any other agricultural or horticultural pest. Products that worked last season may be significantly less effective this season. This is why rotation between different treatment mechanisms — and emphasis on physical and environmental controls — is the gold standard approach.
2. How to Identify Spider Mites
Visual Signs — What to Look For
Stippling: The earliest and most reliable sign. Fine yellow, white, or bronze dots covering the upper surface of leaves — caused by individual feeding punctures. Hold an affected leaf up to light and the stippling pattern becomes very clear.
Webbing: Fine, silk-like webbing on leaf undersides, between leaves, or along stem junctions. Not all spider mite species produce obvious webbing in early infestations — don’t rule out mites just because you don’t see webbing yet.
Pale, bleached, or bronzed leaves: As feeding damage accumulates, affected leaf areas lose color and take on a dusty, grayish, or bronzed appearance.
Leaf drop: In severe infestations, damaged leaves yellow and drop prematurely.
The paper test: Hold a sheet of white paper under a suspect branch and tap the stem firmly. If spider mites are present, tiny specks will fall onto the paper. Look closely — they will be moving. This simple test confirms active infestation and can detect mites before visible stippling or webbing develops.
Spider Mites vs. Other Common Pests
| Feature | Spider Mites | Mealybugs | Fungus Gnats | Aphids | Scale |
|---|---|---|---|---|---|
| Visible to naked eye | Barely — very tiny | Yes — white, fluffy | Yes — tiny flies | Yes — green/black clusters | Yes — brown bumps |
| Webbing | Yes (fine silk) | No | No | No | No |
| Location | Leaf undersides | Stem joints, leaf bases | Soil surface | New growth tips | Stems and leaf undersides |
| Leaf damage type | Stippling, bleaching | Yellowing, sticky residue | Root feeding | Distorted new growth | Yellowing, sticky residue |
| Killed by standard insecticide | ❌ NO | ✅ Yes | Partially | ✅ Yes | ✅ Yes |
The most important distinction: if standard neem oil leaf spray or insecticidal soap doesn’t seem to be working after several treatments, you may have spider mites where other pests were expected — switch to a dedicated miticide.
3. Which Plants Are Most Vulnerable
Spider mites attack a very wide range of houseplants, but certain plants are significantly more susceptible than others — either due to their leaf structure or their natural growing conditions:
Highly susceptible:
- Calathea and Maranta (check these plants frequently — see our Calathea care guide)
- Fiddle Leaf Fig
- Roses
- Orchids
- Ivy (English Ivy particularly)
- Herbs (especially basil, rosemary, mint)
- Spider Plant
Moderately susceptible:
- Monstera
- Rubber Plant
- Pothos
- Schefflera
- Palms
Less commonly affected:
- Snake Plant
- ZZ Plant
- Succulents and cacti (though not immune)
- Cast Iron Plant
4. The Spider Mite Lifecycle — Why This Determines Treatment
Understanding the lifecycle is essential to eliminating mites completely rather than just temporarily suppressing them.
Egg: Laid on leaf undersides, often at the base of webbing. Nearly invisible — spherical, clear to pale yellow. Hatch in 3–5 days under warm conditions.
Larva: 6-legged (adult mites have 8 — the larval stage is the “arachnid rule breaker”). Begins feeding immediately. Lasts 1–2 days.
Nymph (2 stages — protonymph and deutonymph): 8-legged, actively feeding and growing. Total nymph duration: 2–4 days.
Adult: Sexually mature, actively feeding and reproducing. Female lifespan: 2–4 weeks. Lays up to 200 eggs.
Total lifecycle at 75°F (typical US home): approximately 1–2 weeks.
Why this matters: Eggs are resistant to most contact treatments — they are enclosed in a protective shell that neem oil, insecticidal soap, and even many miticides do not penetrate reliably. A single treatment that kills all adults and nymphs still leaves hundreds of eggs behind that will hatch 3–5 days later and restart the cycle.
The treatment implication: You must treat repeatedly on a 4–5 day cycle for a minimum of 3–4 weeks to catch multiple generations as they hatch. Treating once or twice and stopping because visible mites are gone is the most common reason treatments fail.
5. The Complete Elimination Protocol (5-Step System)
True spider mite elimination requires all five steps executed concurrently and consistently:
Step 1 — Isolate: Prevent spread before anything else. Step 2 — Physical removal: Reduce population immediately before chemical treatment. Step 3 — Chemical/biological treatment: Kill remaining mites across multiple lifecycle stages. Step 4 — Environmental control: Remove the conditions that favor mite population explosions. Step 5 — Ongoing monitoring: Confirm elimination and prevent reinfestation.
6. Step 1: Isolate Immediately
Spider mites spread rapidly between plants — by contact, by air movement carrying webbing, and by moving on clothing or hands between plants during care routines.
Immediate action:
- Move any plant showing signs of spider mites away from all other plants. At least 3–4 feet separation; a separate room is better.
- Inspect every plant that was near the affected plant closely using the paper test described above. Treat all confirmed or suspected plants.
- Do not use the same watering can, spray bottle, or pruning tools on both affected and healthy plants without sterilizing between uses (wipe down tools with isopropyl alcohol).
7. Step 2: Physical Removal — The Underrated First Step
Before applying any treatment, physically reduce the spider mite population as dramatically as possible. This dramatically improves the effectiveness of all subsequent chemical treatments.
Shower Treatment
Take the plant to a shower or outdoor hose and rinse the entire plant — especially the leaf undersides where mites and eggs concentrate — with a strong but not damaging stream of water. This physically dislodges mites, eggs, and webbing, reducing the population by 50–90% in one step.
Technique:
- Use lukewarm water (cold water can shock tropical plants)
- Focus specifically on leaf undersides — this is where the majority of the population lives
- Work methodically through the entire plant
- For large floor plants, a handheld showerhead on the bathroom floor works well
Repeat the shower treatment before each chemical treatment application.
Manual Wiping
For plants where showering isn’t practical, wipe every leaf surface — especially undersides — with a soft cloth dampened in a mild soapy water solution (a few drops of dish soap in a cup of water). This physically removes mites and breaks down webbing.
For small plants or individual leaves with heavy webbing, this manual approach is more thorough than showering because you can apply direct pressure to affected areas.
8. Step 3: Chemical & Biological Treatments
Treatment 1: Neem Oil Spray (First-Line Treatment)
Mix: 2 tsp neem oil + 1 tsp mild dish soap per quart of water. Shake vigorously before each application.
Application: Spray every leaf surface thoroughly — top and bottom. Work in the early morning or evening rather than during bright midday light, as neem oil on leaves in direct sun can cause phytotoxicity (leaf burn).
How it works: Neem oil contains azadirachtin, which acts as an insect/mite growth regulator, disrupting molting and reproduction. The oil component also smothers eggs and soft-bodied nymphs on contact. However, neem does not reliably penetrate eggs — consistent repeat applications are essential.
Frequency: Every 4–5 days for 4–6 weeks minimum.
Important note: Neem oil is moderately effective against spider mites but is not the strongest miticide available. It works well for mild to moderate infestations when applied consistently. For severe infestations, escalate to stronger options below.
Treatment 2: Insecticidal Soap
Product: Diluted castile soap or purpose-made insecticidal soap (Safer Brand and similar widely available at US garden centers and Amazon).
How it works: Soap disrupts the cellular membranes of soft-bodied pests on contact — effective against mites and nymphs directly contacted. No residual effect — only kills what it directly touches.
Application: Thorough coverage of all leaf surfaces, repeated every 4–5 days.
Best use: As a complement to neem oil — alternate insecticidal soap and neem treatments every 4–5 days for broader coverage.
Treatment 3: Rosemary Oil Spray (Natural Alternative)
Research published by the University of California Agriculture and Natural Resources program found that rosemary oil-based sprays (commercially available as EcoSMART products and others) show significant efficacy against spider mites, comparable to some synthetic miticides, with an excellent plant and human safety profile.
Application: Per product instructions. Generally applied every 5–7 days.
Best for: Plant owners seeking effective natural options beyond neem; also useful as a rotation partner since mites cannot develop resistance to physical essential-oil-based mechanisms the way they can to chemical miticides.
Treatment 4: Synthetic Miticides (For Severe Infestations)
For severe, rapidly progressing infestations where natural treatments are not achieving control, synthetic miticides provide the strongest available action.
Effective active ingredients to look for:
- Bifenazate (Floramite) — kills adults and nymphs, excellent efficacy, low plant phytotoxicity risk
- Spinosad — derived from naturally occurring soil bacteria; effective miticide with good safety profile
- Abamectin — highly effective broad-spectrum miticide; follow label directions carefully
Critical resistance-management rule: Never use the same miticide active ingredient more than twice in a row. Spider mites develop resistance extremely rapidly to repeated exposure to the same chemistry. Rotate between at least two different active ingredients across your treatment period.
All synthetic miticide products widely available at US garden centers including Home Depot, Lowe’s, and online through Amazon and specialty horticultural retailers.
Treatment 5: Predatory Mites (Biological Control)
For serious collectors or greenhouse-style indoor setups, predatory mites — particularly Phytoseiulus persimilis and Neoseiulus californicus — are commercially available biological control agents that feed specifically on spider mites without harming plants.
Where to source: Arbico Organics, Koppert Biological Systems, and several other US suppliers ship live predatory mites nationwide.
Best for: Growers with large collections or repeated spider mite problems who want a sustainable, non-chemical long-term management approach. Not practical for single-plant treatments.
The University of California IPM Program provides excellent research-backed guidance on biological control options for spider mites, including predatory mite selection and introduction timing.
9. Step 4: Environmental Control
Spider mites thrive in specific conditions: warm, dry, dusty environments with poor air circulation. Modifying your indoor environment removes the conditions that enable explosive population growth.
Increase Humidity
This is the single most powerful environmental control measure for spider mites. Mites reproduce significantly more slowly in humid conditions — their eggs and soft bodies desiccate faster, mortality rates increase, and population growth slows dramatically.
Target: Maintain indoor humidity above 50% in rooms with houseplants. A small humidifier achieves this reliably and benefits your plants across multiple dimensions simultaneously.
Why this matters in American homes: Central air conditioning (summer) and central heating (winter) both reduce indoor humidity dramatically — often to 20–30%. This low-humidity environment is ideal for spider mite reproduction. American homes with forced-air HVAC systems are essentially optimized for spider mite outbreaks without intervention.
Improve Air Circulation
Stagnant, still air allows spider mites to move freely through their webbing and settle on new plants. Gentle air movement (a small fan on low speed, open windows in mild weather) disrupts mite dispersal and dries out webbing, inhibiting their ability to colonize new leaf surfaces.
Regular Leaf Cleaning
Dust accumulation on leaf surfaces creates the perfect microhabitat for spider mites — dust provides shelter, traps moisture, and obscures mites from casual inspection. Wipe large-leafed plants (Rubber Plant, Monstera, Fiddle Leaf Fig) with a damp cloth monthly. Rinse smaller-leafed plants in the shower periodically.
This is both a preventative measure and an early detection tool — regularly handled and inspected plants reveal infestations weeks earlier than plants that are never touched.
10. Step 5: Ongoing Monitoring & Prevention
During Treatment
- Perform the paper test every 5–7 days to objectively monitor mite populations. Count the number of moving specks — if your treatment is working, counts should decline over successive weeks.
- Continue treatment for at least 4 weeks after the last visible mite is detected, to catch eggs hatching over multiple lifecycle cycles.
- Check previously healthy nearby plants weekly throughout the treatment period.
Long-Term Prevention
Quarantine all new plants. New plants from nurseries, garden centers, and online retailers are the primary introduction route for spider mites. Quarantine for 2 weeks in a separate area, inspecting several times before integrating with your collection.
Monthly inspections. Build leaf inspection (using the paper test) into your monthly plant care routine. Early detection when populations are low makes elimination dramatically easier.
Maintain adequate humidity. The single most effective long-term prevention measure. Plants in environments maintained above 50% humidity experience significantly lower spider mite incidence than those in dry air.
Avoid plant stress. Stressed plants — from underwatering, over-drying, poor nutrition, or inadequate light — are significantly more susceptible to spider mite damage than healthy, vigorous plants. A well-maintained plant has a better ability to tolerate some mite feeding without becoming critically damaged. See our plant care for beginners guide for the foundational practices that keep plants healthy and resilient.
Keep leaves clean. Regular wiping and occasional showering of all plants maintains a physical environment that is less hospitable to mite colonization and enables early detection.
11. Treatment Comparison Chart
| Treatment | Effectiveness | Speed | Safety | Best For |
|---|---|---|---|---|
| Shower/physical removal | High (immediate knockdown) | Immediate | ✅ Completely safe | First step, all infestations |
| Neem oil spray | Moderate | Slow (cumulative) | ✅ Safe | Mild–moderate infestations |
| Insecticidal soap | Moderate | Moderate | ✅ Safe | Complement to neem |
| Rosemary oil spray | Moderate–High | Moderate | ✅ Very safe | Natural rotation partner |
| Bifenazate (Floramite) | Very High | Fast | ⚠️ Follow label | Severe infestations |
| Spinosad | High | Moderate–Fast | ✅ Low toxicity | Moderate–severe; rotation |
| Predatory mites | Very High (long-term) | Slow to establish | ✅ Completely safe | Large collections, recurring problems |
12. Frequently Asked Questions
Q: Will neem oil kill spider mites? Neem oil has genuine efficacy against spider mites, particularly the azadirachtin component which disrupts mite development and reproduction. However, it does not reliably penetrate eggs, so consistent repeat applications every 4–5 days over 4–6 weeks are essential for full elimination. For severe infestations, neem alone may be insufficient — combine with insecticidal soap or rotate to a stronger miticide.
Q: Can spider mites live in soil? Spider mites are leaf-surface and stem pests — they do not live or breed in soil. If you’re seeing tiny mites in the soil, you may have a different pest such as soil mites (generally harmless decomposers) or root mealybugs. Spider mites are found on leaf surfaces, stems, and in webbing between plant parts — not in the soil.
Q: How do I know if treatment is working? The paper test is your best objective monitoring tool. Tap a suspect branch over white paper and count moving specks. If your treatment is working, successive weekly paper tests should show declining counts. Additionally, no new stippling damage should appear on leaves that weren’t already affected, and existing webbing should begin to look old and dry rather than fresh and active.
Q: Can spider mites spread to humans or pets? Spider mites do not bite humans and are not a human health concern. They can cause mild skin irritation in people with very sensitive skin who handle heavily infested plants. They are not harmful to pets. They can, however, spread rapidly between plants — isolation and treatment are essential for protecting your plant collection.
Q: How long does it take to completely eliminate spider mites? With consistent treatment following the protocol above, most mild-to-moderate infestations show significant improvement within 2–3 weeks. Complete elimination — including catching all egg hatch cycles — typically requires 4–6 weeks of consistent treatment. Severe infestations can take longer, particularly if the plants involved are large or if the treatment program was started late.
Q: My plants keep getting spider mites — why does this keep happening? Recurrent spider mite infestations almost always indicate one or more persistent environmental factors: consistently low indoor humidity (the most common), infrequent leaf inspection allowing small populations to establish before detection, or new plants being introduced without quarantine. Address humidity as the first priority — plants in environments above 50% humidity have dramatically lower spider mite recurrence rates than those in typical dry US indoor conditions.
For broader guidance on creating a healthy plant environment that resists pest problems, see our best low-maintenance indoor plants guide and our complete watering guide.