
How to Build an Indoor Herb Garden in Your Kitchen: The Complete American Home Guide
Tags: best herbs to grow inside, grow basil indoors, how to grow herbs indoors, indoor herb garden kitchen, indoor herb planter USA, kitchen herb garden ideas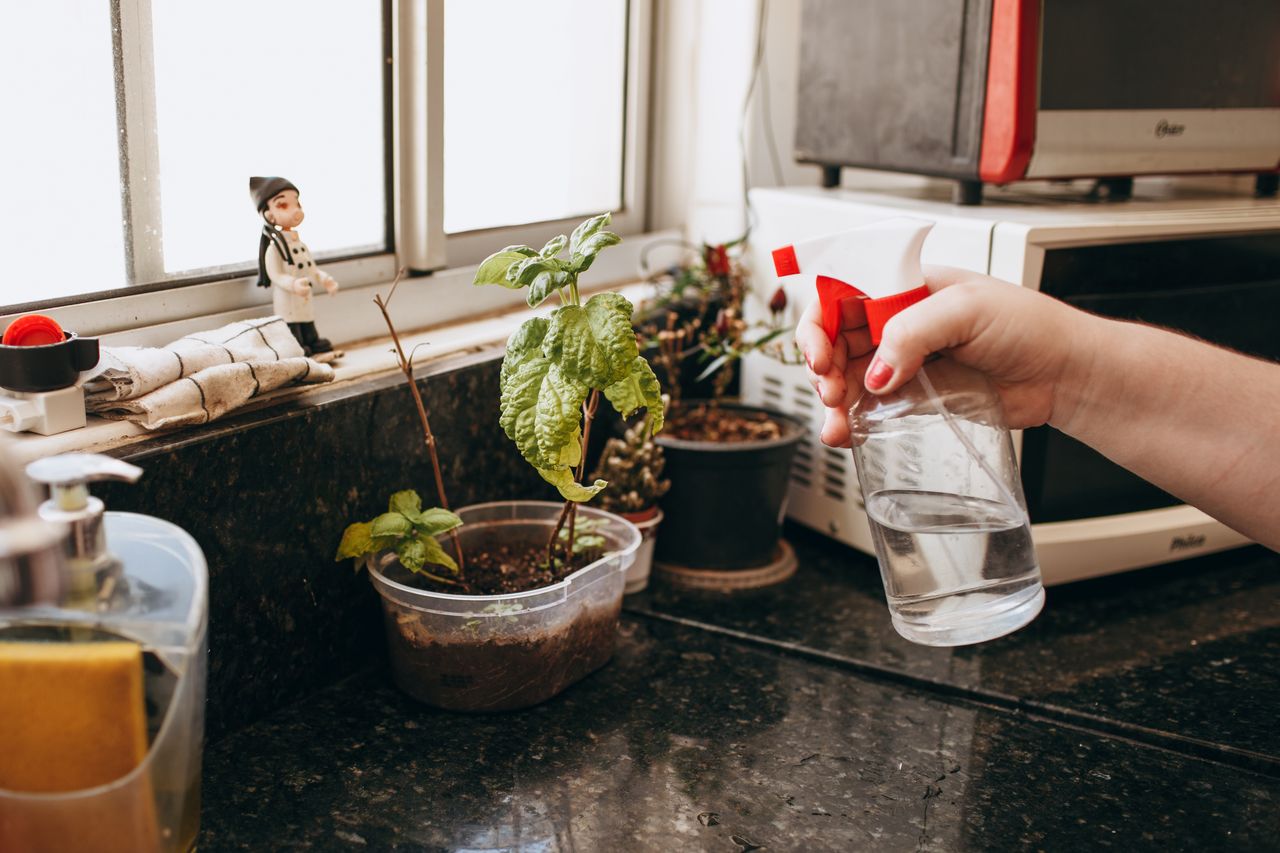
Imagine reaching over while cooking dinner and snipping a handful of fresh basil straight from your windowsill. No grocery store run, no wilted plastic-wrapped bundles, no $4 herb packs you use once and throw away. Just fresh, fragrant, living herbs — available whenever you need them.
That’s the reality of owning a kitchen herb garden, and it’s far easier to build than most Americans think. Whether you’re working with a sun-drenched farmhouse kitchen or a compact NYC apartment with a single north-facing window, this guide will walk you through every step of creating an indoor herb garden that’s both beautiful and genuinely useful.
We’ll cover the best herbs for indoor growing, lighting requirements, container options, soil and watering, common problems, and a room-by-room styling approach that makes your herb garden one of the most visually striking elements in your kitchen.
Let’s get growing. 🌱
Table of Contents
- Why Every American Kitchen Needs an Herb Garden
- The 10 Best Herbs to Grow Indoors
- Light: The Single Most Important Factor
- Choosing Your Containers & Setup Style
- Soil, Drainage & Feeding Your Herbs
- Watering Indoor Herbs: The Right Way
- Step-by-Step: Setting Up Your Kitchen Herb Garden
- Styling Your Herb Garden for Maximum Visual Impact
- Harvesting & Using Your Herbs
- Troubleshooting: Common Indoor Herb Problems
- Frequently Asked Questions
1. Why Every American Kitchen Needs an Herb Garden
Fresh herbs are one of the most underappreciated kitchen upgrades you can make. According to the USDA Economic Research Service, American households spend billions annually on fresh produce — and fresh herbs are among the most frequently wasted items in refrigerators nationwide. Pre-packaged supermarket herbs last only 3–5 days. A living herb plant on your windowsill? It keeps giving for months, sometimes years.
Here’s what a kitchen herb garden actually delivers:
Financial savings: A single basil plant ($4–$6 at a nursery) produces the equivalent of 10–15 supermarket herb packs ($40–$60 worth) over its lifetime. The math is undeniable.
Superior flavor: Culinary professionals universally agree — herbs snipped seconds before use have dramatically more volatile oil content (the compounds responsible for flavor and aroma) than anything that’s been refrigerated and shipped.
Daily décor value: A row of thriving herb pots on a kitchen windowsill is one of the most visually charming, warmly human things a home can have. It communicates care, intention, and a love of cooking. For a broader look at how herbs fit into a full plant décor strategy, see our ultimate guide to indoor plants for home décor.
A gateway to plant confidence: Herbs are forgiving, fast-growing, and immediately rewarding. More than half of the dedicated plant enthusiasts we’ve talked to trace their passion back to a single herb pot on a kitchen windowsill.
2. The 10 Best Herbs to Grow Indoors
Not all culinary herbs thrive indoors. Some — like dill and fennel — grow too large and bolt (go to seed) too quickly to be practical inside. Others were practically born for the windowsill. Here are the ten best performers for American kitchens:
🌿 Basil (Ocimum basilicum)
Difficulty: Easy | Light: Bright direct (south/west window) | Water: Keep moist
The king of kitchen herbs and the most popular herb grown in US homes. Basil needs more light than almost any other culinary herb — a minimum of 6 hours of direct sun. Without adequate light, it gets leggy and loses flavor fast. Pinch flower buds the moment they appear to extend the plant’s productive life.
Best varieties for indoors: Genovese (classic Italian), Thai Basil (for Asian cooking), and the compact Spicy Globe Basil (perfect for small pots).
🌿 Mint (Mentha spp.)
Difficulty: Easy | Light: Bright indirect | Water: Keep moist, never dry
Mint is practically aggressive in its desire to grow. It’s so vigorous that it’s best kept in its own pot rather than a mixed planter — it will crowd out everything else. Tolerates lower light better than basil. Excellent for teas, cocktails, and summer cooking.
Best varieties: Spearmint (all-purpose), Peppermint (teas and desserts), Chocolate Mint (yes, it really smells like chocolate).
🌿 Chives (Allium schoenoprasum)
Difficulty: Very Easy | Light: Bright indirect | Water: Moderate
One of the most foolproof herbs for indoor growing. Chives are cold-tolerant, relatively low-light tolerant, and taste great in eggs, soups, salads, and cream cheese. They produce pretty purple flowers that are edible too. Snip from the top and they just keep growing.
🌿 Rosemary (Salvia rosmarinus)
Difficulty: Moderate | Light: Bright direct | Water: Allow to dry between waterings
Rosemary is the most drought-tolerant culinary herb on this list — it actually prefers to dry out a bit between waterings, making it more forgiving for forgetful waterers. It needs very bright light (south-facing window or grow light). Slow-growing but long-lived.
🌿 Thyme (Thymus vulgaris)
Difficulty: Easy | Light: Bright direct or indirect | Water: Allow to slightly dry
One of the most versatile culinary herbs and an excellent indoor performer. Thyme is woody and compact, fitting neatly in a small pot. It’s also beautifully ornamental — its tiny leaves on delicate branches look almost sculptural.
🌿 Parsley (Petroselinum crispum)
Difficulty: Easy | Light: Bright indirect | Water: Moderate
Both curly and flat-leaf (Italian) parsley grow well indoors. Parsley is slow to germinate from seed (3–4 weeks), so buying a starter plant is easier for most home gardeners. It’s one of the most used herbs in American cooking.
🌿 Oregano (Origanum vulgare)
Difficulty: Easy | Light: Bright direct or indirect | Water: Allow to dry between waterings
Mediterranean in origin, oregano loves warm, bright conditions. It’s drought-tolerant, compact, and grows enthusiastically with a little regular trimming. Essential for pizza, pasta, and Greek cooking.
🌿 Cilantro (Coriandrum sativum)
Difficulty: Moderate | Light: Bright indirect | Water: Keep moderately moist
Cilantro is beloved in American kitchens — essential for Mexican, Indian, and Southeast Asian cooking — but it’s a little tricky indoors because it bolts quickly in heat. Keep it away from hot appliances, harvest frequently to slow bolting, and succession-plant (plant new seeds every 3–4 weeks) to maintain a steady supply.
🌿 Lemon Balm (Melissa officinalis)
Difficulty: Very Easy | Light: Bright indirect | Water: Keep moderately moist
Often overlooked, lemon balm is a revelation for tea drinkers, cocktail makers, and dessert cooks. It grows vigorously, tolerates lower light better than most herbs, and has a beautiful fresh lemon scent that makes it one of the most pleasant herbs to have in a kitchen.
🌿 Lavender (Lavandula angustifolia)
Difficulty: Moderate | Light: Bright direct | Water: Allow to dry significantly between waterings
Technically more of a wellness and aromatherapy herb than a culinary one (though it’s used in baking, lemonade, and herbes de Provence), lavender earns its place in the kitchen for pure sensory beauty. It needs excellent drainage and very bright light — a south-facing window is ideal. When it’s happy, it will bloom repeatedly.
3. Light: The Single Most Important Factor
If there’s one thing that kills more indoor herb gardens than anything else, it’s insufficient light. Herbs are, at their core, sun-loving outdoor plants that we’re asking to live inside. Most culinary herbs require a minimum of 4–6 hours of direct or very bright indirect sunlight per day.
Here’s a quick assessment guide for your kitchen:
South-facing window: Gold standard. Full direct sun for most of the day. You can grow almost any herb here. Ideal for basil, rosemary, thyme, oregano, and lavender.
East-facing window: Good. Gets bright direct sun in the morning and bright indirect light the rest of the day. Good for chives, parsley, mint, and lemon balm. Marginal for basil and rosemary.
West-facing window: Good to adequate. Gets direct afternoon sun (which can be intense in summer — watch for scorching). Similar performance to east-facing.
North-facing window: Challenging. Low indirect light only. Most culinary herbs will struggle here without supplemental lighting.
Using Grow Lights
If your kitchen doesn’t have bright south or east-facing windows, don’t give up — full-spectrum LED grow lights have transformed indoor herb growing. Modern grow lights are sleek, energy-efficient, and surprisingly affordable (quality units start at around $25–$40 on Amazon). Clamp a small grow light to a shelf above your herb pots, set it on a timer for 14–16 hours per day, and you’ll grow herbs that rival anything from a sunny outdoor garden.
The University of Minnesota Extension recommends grow lights for any indoor herb setup in northern states, particularly from October through March when natural daylight hours drop below 10 per day.
4. Choosing Your Containers & Setup Style
Your container choice impacts both aesthetics and plant health. Here’s what to know:
Drainage Is Non-Negotiable
Every herb container must have drainage holes. Herbs are highly susceptible to root rot from waterlogged soil. If you fall in love with a pot that has no drainage hole, simply pot your herb in a slightly smaller nursery pot with drainage and drop it inside the decorative container.
Container Size Guide
| Herb | Minimum Pot Size |
|---|---|
| Basil | 6–8 inches diameter |
| Mint | 8 inches (it spreads!) |
| Chives | 6 inches |
| Rosemary | 8–12 inches |
| Thyme | 6 inches |
| Parsley | 8 inches |
| Lavender | 10–12 inches |
| Cilantro | 8 inches deep (it has a taproot) |
Popular Kitchen Herb Garden Setup Styles
The Windowsill Row: The classic. A line of matching terra cotta pots on your windowsill. Simple, timeless, and highly effective. Label each pot with a small chalkboard stake for a farmhouse-chic touch. Best for kitchens with wide, south-facing windowsills.
The Wall-Mounted Rack: Vertical herb planters mounted on a wall near the window are gaining popularity rapidly in American kitchens — they save counter space and create a beautiful living wall feature. Brands like Umbra and MKONO make excellent wall-mounted herb systems widely available in the US.
The Tiered Plant Stand: A 3-tier plant stand near the window lets you grow 9–12 herb pots at once in the vertical footprint of a single stool. Ideal for kitchen nooks or apartments where counter space is limited.
The Countertop Herb Garden Kit: Self-watering hydroponic herb kits like the AeroGarden Harvest are plug-and-play solutions that include built-in grow lights. They’re ideal for renters, beginners, or anyone who wants fresh herbs with zero guesswork. Not as beautiful as hand-styled pot arrangements, but impressively productive.
5. Soil, Drainage & Feeding Your Herbs
The Right Soil Mix
Standard potting mix works for most herbs, but the ideal indoor herb soil is slightly lighter and faster-draining than a typical all-purpose mix. Here’s a simple DIY blend used by experienced indoor herb gardeners:
- 2 parts quality potting mix (like Fox Farm Ocean Forest or Espoma Organic Potting Mix)
- 1 part perlite (for drainage)
- Optional: a tablespoon of worm castings per pot (natural, gentle fertilizer)
For Mediterranean herbs specifically (rosemary, thyme, oregano, lavender), increase the perlite ratio to 1:1 with potting mix. These plants evolved in rocky, poor, fast-draining soils — they actively dislike rich, moisture-retaining mixes.
Fertilizing
Kitchen herbs are harvested frequently, which means they’re constantly putting out new growth and need nutrients to support it. Fertilize monthly with a balanced, diluted liquid fertilizer during the growing season (spring through fall). Reduce to every 6–8 weeks in winter.
Avoid over-fertilizing. Counter-intuitively, too much nitrogen produces lush, leafy plants with less flavor concentration — the plant puts its energy into growth rather than producing the essential oils that make herbs taste great.
6. Watering Indoor Herbs: The Right Way
Watering is where most indoor herb gardens fail. The two extremes — overwatering and underwatering — both kill plants, but overwatering is by far the more common killer.
The finger test: Before watering, push your finger 1 inch into the soil. If it feels moist, wait. If it feels dry, water thoroughly.
How to water correctly: Water until it flows freely from the drainage holes. Then allow the soil to dry to the 1-inch mark before watering again. This cycle — thorough watering followed by a drying period — promotes healthy root development and prevents root rot.
Herb-specific watering needs:
| High moisture herbs (water more frequently) | Low moisture herbs (water less frequently) |
|---|---|
| Basil, Mint, Parsley, Cilantro, Lemon Balm | Rosemary, Thyme, Oregano, Lavender |
For a complete, plant-by-plant breakdown of indoor watering best practices, see our dedicated guide on how to water indoor plants.
7. Step-by-Step: Setting Up Your Kitchen Herb Garden
Here’s a simple, clear action plan to get your kitchen herb garden established this week.
Step 1: Assess your light Stand at your kitchen window at noon and observe the sunlight. Note which direction the window faces and how many hours of direct sun hit the windowsill or counter area where you plan to place your herbs.
Step 2: Choose your herbs Based on your light assessment, select 3–5 herbs from the list in Section 2. Start with the easiest ones — basil, chives, mint, and thyme are the ideal beginner combination.
Step 3: Source your plants Visit a local nursery, garden center, or Whole Foods / Trader Joe’s (both regularly stock excellent live herb plants). Buying starter plants rather than growing from seed is strongly recommended for beginners — you’ll get results months faster.
Step 4: Choose and prepare your containers Select containers with drainage holes that match your kitchen’s aesthetic. Fill with your soil mix, leaving 1 inch of space at the top.
Step 5: Plant your herbs Gently loosen the roots of your starter plant, place in the new container, fill around the sides with soil, and press gently to remove air pockets. Water immediately after planting.
Step 6: Position near light Place on your brightest windowsill, under a grow light, or on a plant stand near a window. Rotate pots a quarter turn each week so all sides receive equal light.
Step 7: Establish a care routine Water when the top inch of soil dries out. Pinch off flower buds as they form. Harvest regularly (see Section 9). Fertilize monthly.
8. Styling Your Herb Garden for Maximum Visual Impact
Your herb garden should be as beautiful as it is useful. Here’s how to make it look intentional rather than improvised:
Coordinate your pots. Matching terra cotta, matching white ceramics, or a cohesive color palette of two tones creates a curated look. Mismatched pots from different stores look chaotic.
Label your herbs. Small hand-written clay labels, metal plant stakes, or chalkboard markers add a charming, organized touch. They’re also genuinely useful when you have multiple similar-looking herbs.
Add height variation. Use pot stands, small cutting boards, or wooden risers to create a tiered display even on a flat surface. Place taller herbs (rosemary, basil) at the back or center, smaller compact herbs (thyme, chives) at the front.
Incorporate non-herb plants. Mix in one or two purely ornamental plants — a small succulent, a trailing string of pearls, or a tiny air plant — to add variety and visual interest. Not everything in a kitchen window display needs to be edible.
Keep it clean. Remove dead leaves, spent blooms, and yellowing stems regularly. A herb garden that looks well-maintained signals home care and attention — a messy, unkempt one undermines the whole aesthetic even if the plants are technically healthy.
For more advanced styling ideas across your whole home, revisit our indoor plants home décor guide.
9. Harvesting & Using Your Herbs
Harvesting isn’t just about getting food — it’s essential plant care. Regular harvesting keeps herbs compact, productive, and prevents bolting.
The golden rule of herb harvesting: Never harvest more than one-third of the plant at any one time. Taking too much at once stresses the plant and slows recovery.
How to harvest the most common kitchen herbs:
Basil: Pinch or cut just above a leaf node (where leaves branch off the stem). Never strip the entire stem bare. Harvest from the top, which encourages bushier, fuller growth below.
Mint: Cut stems back by one-third. Mint is vigorous and can handle frequent harvesting. The more you cut, the bushier and more productive it becomes.
Chives: Snip from the top, leaving at least 2–3 inches of the stem. They’ll regrow from the base.
Rosemary & Thyme: Snip from the soft, green tips. Avoid cutting into woody stems — they won’t regenerate.
Parsley: Cut from the outer stems, allowing the inner stems to continue growing.
Cilantro: Harvest the outer leaves and whole stems once the plant reaches 6 inches tall. To slow bolting, cut flower stalks the moment they appear.
Beyond Cooking: Other Uses for Fresh Kitchen Herbs
Your herb garden does more than flavor food. Fresh herbs from your kitchen garden can be used to:
- Make herbal teas: Mint, lemon balm, and lavender make exceptional home-brewed teas.
- Create simple syrups: Rosemary simple syrup and basil simple syrup are staples of modern American cocktail culture.
- DIY home fragrances: Bundle fresh lavender or rosemary and hang to dry near the stove.
- Natural cleaning sprays: Steep rosemary and lavender in white vinegar for 2 weeks to create a fragrant, antimicrobial kitchen surface cleaner.
10. Troubleshooting: Common Indoor Herb Problems
Problem: Leaves are yellow and falling off. Cause: Usually overwatering (most common) or nitrogen deficiency. Fix: Check the soil — if it’s wet and you water frequently, let it dry more between waterings and improve drainage. If soil looks fine, try a diluted liquid fertilizer.
Problem: Herbs are “leggy” (long, thin, pale stems reaching toward the window). Cause: Insufficient light. Fix: Move to a brighter window or add a grow light. Rotate pots weekly.
Problem: Basil leaves have dark spots or are wilting despite moist soil. Cause: Could be Fusarium wilt (a fungal disease) or cold air drafts from windows in winter. Fix: Move away from cold drafts. If the whole plant wilts from the soil up, Fusarium wilt may be the cause — discard the plant and sterilize the pot before replanting.
Problem: White crust on soil or pot surface. Cause: Mineral deposits from tap water or over-fertilization. Fix: Switch to filtered or room-temperature water. Flush the soil thoroughly with water to leach out mineral buildup. Reduce fertilizer frequency.
Problem: Tiny insects on the undersides of leaves. Cause: Aphids, fungus gnats, or spider mites — all common in indoor environments. Fix: Spray with a diluted neem oil solution (1 tsp neem oil + 1 tsp mild dish soap + 1 quart water). The Penn State Extension has excellent free resources on integrated pest management for indoor gardens.
Problem: Herbs bolt (go to seed) quickly. Cause: Heat, long days, or plant maturity. Very common in cilantro and basil. Fix: Harvest more frequently. Pinch flower buds immediately. Keep away from heat sources. For cilantro, succession-plant every 3–4 weeks.
Frequently Asked Questions
Q: What is the easiest herb to grow indoors for a complete beginner? Chives are the single most foolproof kitchen herb for US home growers. They tolerate some low light, irregular watering, and still produce reliably. Start with chives, then add basil and mint once you have your setup dialed in.
Q: Can I keep herbs alive year-round indoors in the USA? Yes — this is one of the greatest advantages of an indoor herb garden. Unlike outdoor herb gardens in most of the country, an indoor herb garden in a warm kitchen with adequate light produces fresh herbs 365 days a year.
Q: Do indoor herbs need to be near a window? They strongly prefer natural light, but grow lights are an effective substitute. The key is that herbs need high-intensity light — a grow light placed 6–12 inches above herb plants is more effective than a dim indoor space far from any window.
Q: Can I mix different herbs in one large pot? Yes, with planning. Group herbs with similar water needs together. “Mediterranean” pot: rosemary, thyme, oregano. “Moisture-loving” pot: basil, parsley, chives. Avoid potting mint with others — it will take over.
Q: How often do I need to replace indoor herb plants? Basil and cilantro are annual plants — they naturally complete their life cycle and die, typically within one growing season. Most other culinary herbs (rosemary, thyme, mint, chives, oregano) are perennials and will live for years with proper care and occasional refreshing with new soil.
Final Thoughts
A kitchen herb garden is one of the highest-return-on-investment projects in this entire website — financially, aesthetically, and culinarily. Once you experience the difference between a pasta sauce made with fresh basil from two feet away and one made with dried herbs from a jar that’s been in your pantry for 14 months, there’s no going back.
Start with three herbs in three coordinated pots on your sunniest windowsill. Build from there.
Continue building your plant home:
🌿 Indoor Plants for Home Décor: The Ultimate Guide