
DIY Plant Propagation Station: Get Free Plants Forever
Tags: DIY plant propagation station, free plants from cuttings, how to propagate plants in water, plant propagation for beginners, propagation station ideas, water propagation houseplants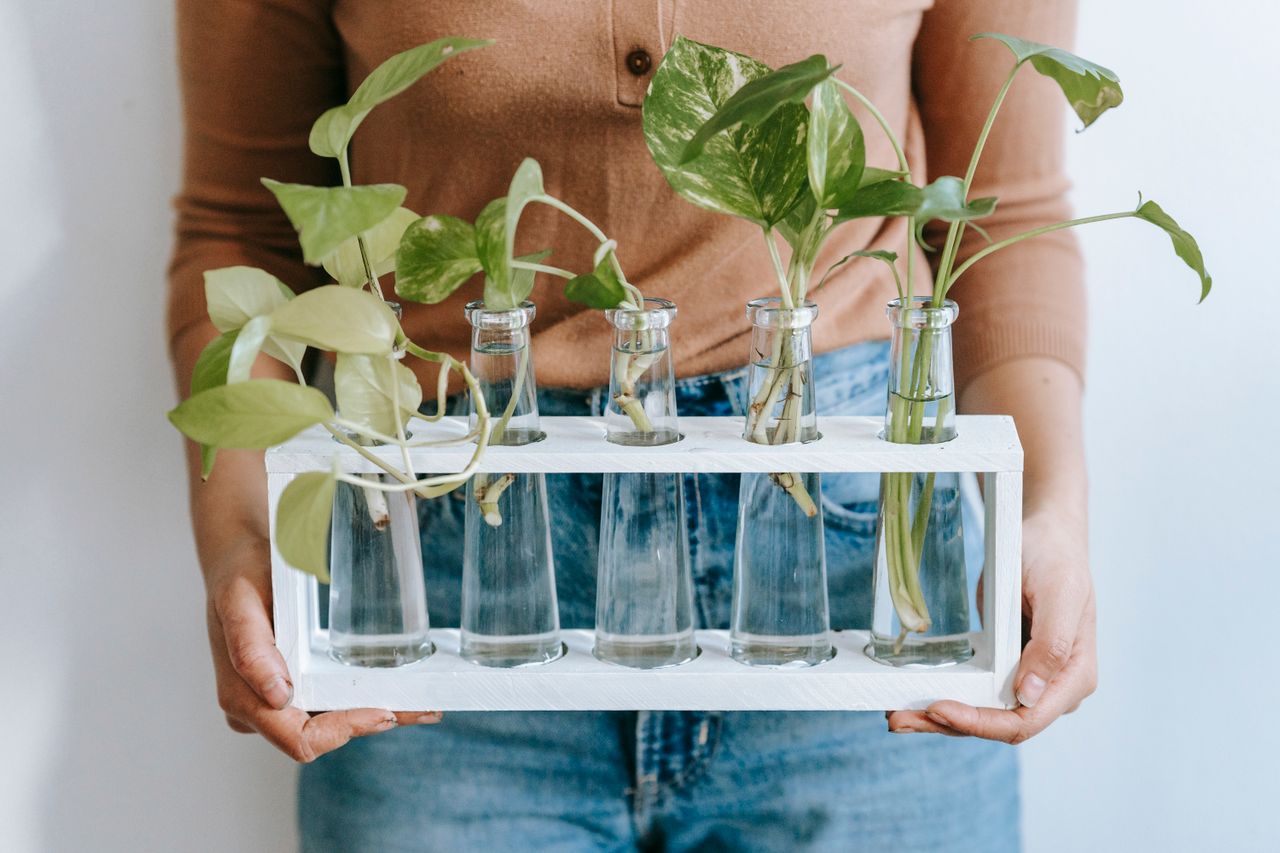
Here’s a secret that veteran plant collectors have known for years: you never actually have to buy another houseplant again.
Every Pothos, Philodendron, Spider Plant, and Monstera in your home is quietly waiting to be multiplied — for free, forever — through a process called propagation. And right now in 2025, the DIY plant propagation station has exploded from a niche plant-geek practice into one of the most viral home décor trends in America.
A well-styled propagation station — rows of glass vessels filled with water, green cuttings, and developing white roots — is simultaneously beautiful, functional, and endlessly satisfying to build and maintain. It’s the kind of thing that stops visitors mid-sentence. It’s all over TikTok (#propagation has hundreds of millions of views), all over Pinterest, and increasingly, on the windowsills and shelves of American homes from Brooklyn to Austin to Portland.
This guide gives you everything: the science of propagation, every method explained, a step-by-step station build for any budget, the best plants to propagate, common mistakes to avoid, and styling ideas that turn your propagation setup into a genuine design feature.
Let’s make some plants. 🌱
Table of Contents
- What Is Plant Propagation (And Why Is Everyone Doing It)?
- The 4 Main Propagation Methods Explained
- The Best Houseplants to Propagate
- How to Build Your DIY Propagation Station: 5 Styles
- Step-by-Step: Water Propagation (The Beginner Method)
- Step-by-Step: Soil Propagation
- Step-by-Step: Moss/Sphagnum Propagation (The Advanced Method)
- Propagation Station Styling: Make It a Décor Feature
- Troubleshooting: Why Won’t My Cuttings Root?
- What to Do Once Your Cuttings Have Rooted
- Frequently Asked Questions
1. What Is Plant Propagation (And Why Is Everyone Doing It)?
Plant propagation is the process of creating new plants from parts of an existing plant — most commonly a stem cutting, leaf, or offset. Instead of buying a new plant, you take a cutting from a plant you already own, encourage it to grow roots, and end up with a complete new plant.
The biology behind it is elegant: most plants have evolved the ability to regenerate from parts of themselves as a survival mechanism. When a branch breaks off in the wild and lands in moist soil, it doesn’t die — it tries to root and continue growing. Propagation is simply us harnessing that drive intentionally.
Why It’s Trending So Hard in 2025
A few converging forces have made propagation go viral:
It’s genuinely free. In an era where a single Monstera can cost $40–$100 at a nursery, the ability to multiply your existing plants at zero cost has obvious financial appeal.
It’s addictive. Watching roots develop in a glass vessel over days and weeks is genuinely captivating. It hits the same part of the brain as unboxing videos or before-and-after transformations — slow, satisfying progress you can watch in real time.
It’s beautiful. A propagation station styled with clear glass vessels, delicate cuttings, and developing root systems is a legitimate interior design feature — not just a utilitarian plant project.
It’s social currency. Propagated plants are among the most popular gifts in American plant communities right now. Giving someone a cutting from your own plant (with its roots already started) is personal, thoughtful, and costs nothing.
The American Horticultural Society recognizes propagation as one of the most fundamental and rewarding skills in home gardening — accessible to complete beginners and infinitely expandable as expertise grows.
2. The 4 Main Propagation Methods Explained
There are four primary propagation methods used by home plant enthusiasts. Each has different difficulty levels, best-suited plant types, and aesthetic qualities.
Method 1: Water Propagation
Difficulty: Beginner | Time to roots: 1–4 weeks | Visual appeal: ⭐⭐⭐⭐⭐
The most popular and visually striking method. Cuttings are placed in a vessel of water where roots develop over time in plain sight. The transparent glass showing the white root development is exactly what makes propagation stations so photogenic and compelling.
Best for: Pothos, Philodendron, Tradescantia, Begonia, Impatiens, Coleus, most tropical houseplants.
Basic process: Take a 4–6 inch cutting just below a leaf node, remove lower leaves so no foliage is submerged, place in water, and wait.
Method 2: Soil Propagation
Difficulty: Easy to Moderate | Time to roots: 2–6 weeks | Visual appeal: ⭐⭐
Cuttings are planted directly into moist potting mix or a specialized propagation medium. Less visually dramatic than water propagation (you can’t see the roots developing) but often produces stronger root systems that translate better to long-term plant health.
Best for: Succulents, Cacti, Rosemary, Lavender, Roses, Peperomia, African Violets.
Method 3: Sphagnum Moss Propagation (Air Layering)
Difficulty: Intermediate | Time to roots: 2–8 weeks | Visual appeal: ⭐⭐⭐⭐
Cuttings are wrapped in moist sphagnum moss (often held in place with plastic wrap or a net cup) rather than submerged in water. Moss maintains ideal humidity around the cutting’s root zone, resulting in faster, more robust root development than water. Increasingly popular in 2025 as plant enthusiasts look for higher-success-rate methods.
Best for: Monstera, Fiddle Leaf Fig, Rubber Plant, Hoya, Pothos.
Method 4: Division / Offset Separation
Difficulty: Very Easy | Time to establish: 1–3 weeks | Visual appeal: ⭐⭐
Some plants naturally produce “offsets” or “pups” — small new plants growing at the base of the mother plant. These can be gently separated and potted independently. No cutting or rooting required — the offset already has its own root system.
Best for: Spider Plants (spiderettes), Snake Plant (rhizome offsets), Aloe Vera (pups), Bromeliad (pups), Peace Lily (division).
3. The Best Houseplants to Propagate
Not all plants propagate equally easily. Here are the most propagation-friendly plants for American home growers, ranked from easiest to most satisfying:
Easiest (Root in Water in 1–2 Weeks)
Pothos (Epipremnum aureum): The propagation hall-of-famer. Takes 1–2 weeks to show roots in water. Nearly 100% success rate. Multiple varieties propagate equally well — Golden, Neon, Marble Queen, Satin. A single mature Pothos can produce dozens of cuttings per year.
Heartleaf Philodendron: Almost as easy as Pothos. Roots develop quickly in water, and the resulting plants are vigorous. One of the best plants for beginners to practice their first propagation.
Tradescantia (Spiderwort): Among the fastest rooters of all houseplants — cuttings often show roots within 5–7 days in water. Available in stunning varieties including the deep purple T. zebrina and the pink-striped Nanouk.
Spider Plant: Produces ready-made “spiderettes” on long runners that can be snipped and placed in water or soil to root. The easiest propagation that requires almost no technique.
Begonia: Stem cuttings root readily in water. Many varieties also propagate from a single leaf.
Intermediate (Root in 2–4 Weeks)
Monstera deliciosa: One of the most sought-after propagations in American plant communities. Each cutting needs at least one node (the bumpy growth point on the stem) to root successfully. Sphagnum moss propagation produces faster, stronger roots than water alone.
Rubber Plant (Ficus elastica): Stem cuttings root well in sphagnum moss. Allow the milky sap to dry for 30 minutes before placing in propagation medium to prevent rot.
Hoya: Popular for their waxy, long-lasting blooms. Stem cuttings with 2–3 nodes root well in water or moss over 3–6 weeks. Highly sought-after in plant trade communities.
Pilea peperomioides (Chinese Money Plant): Produces “pups” at the soil surface that can be separated and potted. Also propagates from stem cuttings in water.
Rewarding (Longer Timeline, Spectacular Results)
Fiddle Leaf Fig: Stem cuttings can be propagated in water or sphagnum moss, though success rates are lower than tropical houseplants and patience is required (4–8 weeks minimum). When it works, it’s deeply satisfying.
Orchid (Keiki propagation): Some orchid varieties produce “keikis” — baby plants that develop on the flowering spike. These can be separated and potted once they develop roots of their own. A treasured and slightly magical propagation to witness.
4. How to Build Your DIY Propagation Station: 5 Styles
Your propagation station should match your home’s aesthetic and your practical needs. Here are five approaches ranging from $0 to under $100.
Style 1: The Glass Jar Collection (Budget: $0–$15)
Best for: Beginners, minimal aesthetic, any home style.
Raid your kitchen cupboards. Mason jars, pasta sauce jars, olive jars, bud vases — any clean glass vessel with an opening wide enough for a cutting works perfectly. The beauty of mismatched vintage glass jars grouped together on a windowsill is genuinely charming and costs nothing.
How to style it: Group 5–9 jars of varying heights along your sunniest windowsill. Use taller jars for longer cuttings (Monstera, Pothos), smaller jars for compact cuttings (Tradescantia, Hoya). The variation in height and glass clarity creates natural visual interest.
Pro tip: Tinted glass (amber, green, blue) slows algae growth in the water and adds a gorgeous color dimension to the display.
Style 2: The Test Tube Station (Budget: $20–$40)
Best for: Modern/minimalist, Scandinavian, contemporary home styles.
Pre-made test tube propagation stations (widely available on Amazon, Etsy, and at specialty plant shops) feature wooden or metal frames holding 6–15 glass test tubes. The result is clean, architectural, and precisely the kind of thing that photographs beautifully for social media.
Setup: Assemble the frame, fill test tubes ¾ full with room-temperature water, insert cuttings (one per tube), and place near a bright window. Change water weekly.
Where to display it: Wall-mounted near a kitchen window or on a desk or shelf near bright indirect light.
Style 3: The Wall-Mounted Propagation Display (Budget: $30–$70)
Best for: Maximizing visual impact, small spaces, bold home styles.
Install small wall hooks or a wooden mounting board near a bright window. Hang individual glass vessels (bud vases, propagation bulbs, test tube holders) at varying heights from the hooks. The result is a living wall installation that grows and changes as cuttings develop into plants.
This style is the most visually dramatic propagation setup and works especially well in kitchens and home offices where vertical wall space near windows is often underutilized.
Build it yourself: A 12×6 inch piece of cedar or pine, sanded and stained, with 3–5 hook screws mounted at different heights, costs under $20 at any US hardware store. Hang glass vessels from the hooks using twine or copper wire for an artisanal, handmade look.
Style 4: The Tiered Wooden Stand (Budget: $40–$80)
Best for: Large collections, boho/farmhouse/eclectic styles, maximum capacity.
Tiered wooden propagation stands (available at most plant retailers, Etsy, and Amazon) hold anywhere from 10 to 40 glass tubes or vessels across multiple levels. These become a genuine focal point — essentially a piece of living furniture.
Position near a bright window. Organize cuttings by plant type, color, or stage of root development for a curated, gallery-like effect.
Style 5: The Upcycled / Thrift Store Station (Budget: $5–$20)
Best for: Eco-conscious, eclectic, budget-focused plant lovers.
Thrift stores and antique markets across the US are filled with glass vases, apothecary bottles, vintage lab glassware, perfume bottles, and ceramic bud vases that make extraordinary propagation vessels. The variety of shapes, sizes, and glass textures creates a collected, one-of-a-kind display that no retail propagation station can replicate.
This is also the most sustainable approach — giving new purpose to glass that might otherwise be discarded.
5. Step-by-Step: Water Propagation (The Beginner Method)
Water propagation is where most plant lovers start — and for good reason. It requires no special materials, produces visible results quickly, and works with the majority of popular houseplants.
What You Need
- A healthy parent plant
- Clean, sharp scissors or pruning shears
- Glass vessels (jars, vases, test tubes)
- Room-temperature water (filtered or left out overnight)
- Bright indirect light
Step 1: Choose and Prepare Your Cutting
Select a healthy stem with 2–4 leaves and at least one node (the small bump or joint where a leaf meets the stem — this is where roots will emerge). Cut cleanly just below a node using clean scissors or shears. Cuts made with dirty tools introduce bacteria that can cause stem rot.
Cut length: 4–6 inches is ideal for most houseplants.
Step 2: Prepare the Cutting
Remove any leaves from the lower half of the cutting — any foliage submerged in water will rot and contaminate the vessel. You want 1–2 bare nodes submerged below the waterline.
For plants with milky or sticky sap (Rubber Plant, Monstera, Fiddle Leaf Fig), allow the cut end to dry and seal for 30–60 minutes before placing in water. This prevents sap contamination.
Step 3: Place in Water
Fill your vessel ¾ full with room-temperature water. Submerge the lower 1–2 inches of the stem (including at least one node) in water. Ensure no leaves are submerged.
Step 4: Position Correctly
Place your vessel in bright indirect light. A windowsill or a well-lit shelf near a window is ideal. Avoid direct sun — it warms the water too quickly, promotes algae growth, and can stress the cutting.
Step 5: Change the Water Regularly
Replace the water every 5–7 days with fresh room-temperature water. This prevents bacterial buildup, maintains oxygen levels in the water, and keeps the vessel clear. This single habit makes the difference between water propagation success and failure.
Step 6: Wait and Watch
Root development timelines vary:
- Pothos, Philodendron, Tradescantia: 1–2 weeks
- Begonia, Impatiens, Coleus: 1–3 weeks
- Monstera, Rubber Plant, Hoya: 3–6 weeks
- Fiddle Leaf Fig: 4–8 weeks (requires patience)
Healthy roots are white or pale yellow and firm. Brown, mushy roots indicate bacterial rot — trim back to clean stem tissue, clean the vessel, refill with fresh water, and continue.
6. Step-by-Step: Soil Propagation
Soil propagation produces stronger root systems than water propagation for many plant types — especially succulents, herbs, and Mediterranean plants that dislike sitting in standing water.
What You Need
- Fresh, moist propagation mix (equal parts perlite and potting mix, or cactus mix for succulents)
- Small pots or cell trays with drainage holes
- Rooting hormone powder or gel (optional but improves success rates)
- A plastic bag or humidity dome (optional)
- Sharp, clean cutting tool
The Process
Step 1: Take a clean cutting just below a node. For succulents and cacti, allow the cut end to callous over (dry out) for 24–48 hours before planting — this prevents rot.
Step 2: Optionally dip the cut end in rooting hormone powder or gel (available at any garden center; improves success rates significantly for woody-stemmed plants like Rosemary, Rubber Plant, and Fiddle Leaf Fig).
Step 3: Make a small hole in the moist propagation mix with a pencil or chopstick (this prevents the rooting hormone from being scraped off when inserting the cutting).
Step 4: Insert the cutting 1–2 inches into the mix. Firm gently around the stem.
Step 5: Optionally cover with a clear plastic bag or humidity dome to maintain moisture. Remove the cover briefly each day for ventilation.
Step 6: Place in bright indirect light. Keep the mix consistently moist (not wet). Check for root development after 3–4 weeks by gently tugging the cutting — resistance means roots have formed.
7. Step-by-Step: Sphagnum Moss Propagation
Sphagnum moss propagation has become the preferred method for serious plant propagators in 2025. It maintains superior humidity around the root zone compared to water, produces faster and more robust roots for many species, and can also be used for air layering on larger plants.
What You Need
- Sphagnum moss (available at any garden center or online)
- Small net cups, propagation boxes, or zip-lock bags
- Filtered or distilled water
- Sharp, clean cutting tool
The Process
Step 1: Soak sphagnum moss in water for 30 minutes. Squeeze out excess water — the moss should be moist but not dripping.
Step 2: Pack damp sphagnum moss into your chosen container (net cups work beautifully for a propagation station aesthetic; clear propagation boxes let you monitor root development).
Step 3: Make a small cavity in the moss for your cutting. Insert the cutting so at least one node is surrounded by moss. Pack moss gently around the stem.
Step 4: Keep the moss consistently moist — mist lightly every 2–3 days or cover with a humidity dome to maintain moisture without constant misting.
Step 5: Place in bright indirect light. Monitor root development by gently checking whether white roots are visible through the container walls or at the drainage holes.
Step 6: Transfer to soil once roots are 1–2 inches long.
8. Propagation Station Styling: Make It a Décor Feature
Your propagation station is both a plant nursery and a design moment. Here’s how to make it stunning:
Create visual layers. Combine tall vessels (for long Monstera cuttings) with medium vessels (Pothos, Philodendron) and tiny test tubes (Tradescantia, succulents). The height variation is what makes a propagation station look styled rather than random.
Use a cohesive vessel palette. All-clear glass is clean and modern. All-amber glass is warm and organic. A mix of clear, amber, and blue tinted glass is bohemian and eclectic. Choose one direction and stick to it.
Label your cuttings. Small chalkboard tags, waterproof adhesive labels, or plant stake markers identifying each variety add an educational, apothecary-lab aesthetic that plant enthusiasts universally love.
Incorporate non-propagating plants. A small potted plant or two positioned near your propagation station contextualizes it within your broader plant collection and adds visual variety.
Choose the right backdrop. A propagation station against a white or light grey wall photographs beautifully and lets the plant material take center stage. For a moodier look, a dark green or terracotta-painted wall creates a dramatic contrast with clear glass vessels and pale roots.
For more styling principles, explore our ultimate indoor plants home décor guide.
9. Troubleshooting: Why Won’t My Cuttings Root?
Problem: Cuttings are developing brown, mushy stem ends. Cause: Bacterial rot, usually from submerged leaves, dirty vessels, or unchanged water. Fix: Remove the cutting, trim the rotted stem back to clean, healthy tissue, sterilize the vessel, refill with fresh water, remove all submerged foliage, and return the cutting.
Problem: Cutting looks healthy but shows no root development after 6+ weeks. Cause: Likely missing a node on the cutting. Without a node, stem cuttings cannot root regardless of method. Fix: Examine the cutting for a visible node (small bump or scar where a leaf attaches). If none is present, take a new cutting that clearly includes at least one node.
Problem: Roots developed in water but the plant died when transferred to soil. Cause: Water-grown roots are structurally different from soil-grown roots — thinner-walled and less equipped to handle the resistance of soil. Transition shock is common when moving from water to dense potting mix. Fix: Use a very lightweight transition mix (1:1 perlite to potting mix), keep consistently moist for the first 2 weeks after transfer, and place in slightly lower light during transition to reduce stress.
Problem: Thick white algae growing in the water vessel. Cause: Light hitting water + nutrients from the cutting = algae bloom. Fix: Use tinted glass to reduce light penetration into the water. Change water more frequently. Clean vessels thoroughly with a small bottle brush between water changes.
Problem: Cuttings look wilted and limp. Cause: Normal for the first 24–48 hours after cutting while the plant adjusts. If wilting persists beyond 3 days, the cutting may be getting too much direct sun (stressing without established roots to support it) or the stem has dried out at the cut end. Fix: Move to bright indirect (not direct) light. Re-cut the stem end by ½ inch to expose fresh tissue.
For more general plant health guidance, see our plant care for beginners guide.
10. What to Do Once Your Cuttings Have Rooted
This is the moment every propagator waits for — real, white, growing roots emerging from your cutting. Here’s what to do next:
Pot up at the right root length. Transfer to soil when roots are 1–3 inches long. Roots shorter than 1 inch are fragile and haven’t yet developed enough to support the cutting in soil. Roots longer than 3 inches can become tangled and are more prone to breaking during transfer.
Choose the right pot size. A rooted cutting needs only a small pot — 2–4 inches diameter for most cuttings. Oversized pots hold too much moisture and can cause root rot in a young plant with a small root system.
Use a gentle transition mix. As noted above, transition from water propagation to soil gradually by using a 1:1 perlite-to-potting-mix blend for the first pot. Once the plant is established (showing new leaf growth), repot into standard potting mix.
Keep humidity elevated post-transfer. Cover the potted cutting with a clear plastic bag or humidity dome for the first 1–2 weeks after transfer. This maintains the high humidity the cutting was adapted to during water propagation and dramatically reduces transplant shock.
Begin normal care. Once the plant shows clear new leaf growth (typically 2–4 weeks after potting), begin treating it exactly like a mature plant of its species. Congratulations — you’ve completed a full propagation cycle.
Gift the extras. One of the most joyful aspects of propagation is having more plants than you need. Potted rooted cuttings make exceptional, deeply personal gifts — far more meaningful than anything you could buy.
11. Frequently Asked Questions
Q: What is the easiest plant to propagate for a complete beginner? Pothos is universally considered the easiest propagation for beginners. Take a 4-inch cutting with one node, place in water on a bright windowsill, and you’ll see roots in 7–14 days with near 100% success rate.
Q: Do I need rooting hormone? Not for most popular houseplants propagated in water (Pothos, Philodendron, Tradescantia) — they root readily without it. Rooting hormone does improve success rates meaningfully for woody-stemmed plants (Rosemary, Rubber Plant, Fiddle Leaf Fig) and succulents propagated in soil.
Q: How often should I change the water in my propagation station? Every 5–7 days. This is the single most important maintenance habit for water propagation success. Fresh water maintains oxygen levels, prevents bacterial buildup, and keeps vessels clear.
Q: Can I propagate directly from a leaf (leaf propagation)? Yes, for specific plants. Succulents (most Echeveria, Sedum, Crassula), Begonias, African Violets, and Peperomia can propagate from individual leaves. Most tropical houseplants (Pothos, Monstera, Philodendron) require a stem cutting with a node — a leaf alone will not produce a new plant.
Q: How long does it take to get a full-sized plant from a propagated cutting? It varies significantly by species. Fast-growing plants like Pothos and Tradescantia can produce a full, lush plant from a cutting within 3–6 months. Slower-growing plants like Monstera and Fiddle Leaf Fig may take 1–2 years to reach a comparable size to a nursery plant.
Q: Is it legal to propagate and sell plants? Most common houseplants can be propagated and sold freely. However, some newer hybrid cultivars are patent-protected and cannot legally be propagated for sale (though propagation for personal use is generally fine). Always verify before selling propagated plants commercially.
Final Thoughts
A plant propagation station is one of the most rewarding projects in this entire guide series — not just because it saves you money (though $0 plants are hard to argue with), but because it deepens your understanding of how plants work and builds a genuine, ongoing connection to your collection.
Start with a Pothos cutting in a jar on your windowsill this weekend. Within two weeks, you’ll have roots. Within a month, a new plant. Within a year, enough plants to fill every room in your house and gifts for everyone you know.
Keep growing with PlantCareHacks:
- 🌿 Indoor Plants for Home Décor: The Complete Room-by-Room Guide
- 🌿 Best Low-Maintenance Indoor Plants for Busy Americans
- 🌿 Plant Care for Beginners: Your First 30 Days
- 🌿 How to Water Indoor Plants Correctly
Cut. Root. Grow. Repeat. 🌱