
How to Start a Vegetable Garden at Home for Beginners (Step-by-Step Guide)
Tags: beginner vegetable garden tips, easiest vegetables to grow at home, how to start a vegetable garden from scratch, vegetable garden for beginners, vegetable garden for small spaces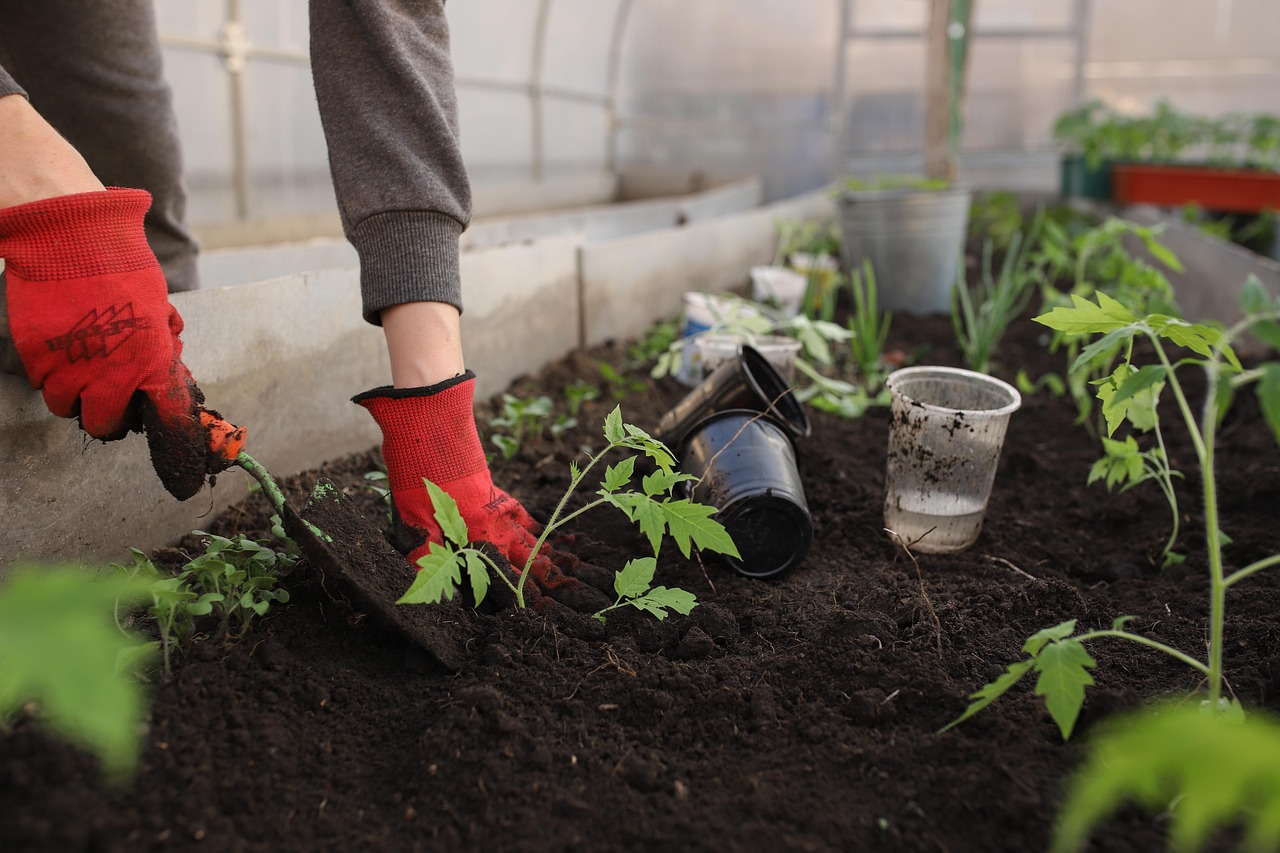
Growing your own vegetables at home sounds like a big project — but it doesn’t have to be. With the right approach, even a complete beginner can go from bare soil (or a small balcony) to harvesting fresh tomatoes, lettuce, and herbs within a single season.
This guide will walk you through every step of starting a vegetable garden at home, from choosing the right location to knowing when to harvest. No complicated equipment, no prior experience needed.
Why Start a Vegetable Garden at Home?
Before diving into the how, here’s the why — because it matters more than most people think.
- Fresh food, always on hand. Homegrown vegetables taste noticeably better than store-bought. They’re picked at peak ripeness, not shipped from hundreds of kilometres away.
- It saves money. A single tomato plant can produce 4–8 kg of tomatoes over a season — from a seedling that costs less than a bag of tomatoes.
- It’s good for your mental health. Gardening is proven to reduce stress and improve mood. There’s something genuinely satisfying about eating food you grew yourself.
- You control what goes in your food. No unknown pesticides, no preservatives. Just vegetables.
Even a small 1m × 2m patch can produce a meaningful amount of food for a household. Let’s get started.
Step 1: Choose the Right Location
The single most important factor in a successful vegetable garden is sunlight. Most vegetables need at least 6 hours of direct sunlight per day — ideally 8.
How to assess your space:
Walk around your outdoor area (garden, balcony, terrace) at different times of day and note which spots get the most sun. South-facing spots in the Northern Hemisphere typically get the best light exposure.
Your options:
- Ground-level garden bed — best for most vegetables; most space and best drainage
- Raised garden bed — excellent for beginners; you control the soil quality, easier on your back
- Containers and pots — ideal for balconies, patios, or renters; surprisingly productive for herbs, tomatoes, and salad greens
Beginner tip: If you’re unsure, start with containers. They’re forgiving, moveable, and require no digging.
What to avoid:
- Spots under trees (shading + root competition)
- Areas with waterlogged or compacted soil
- Spots next to walls that block afternoon sun
Step 2: Pick the Right Vegetables to Grow First
Not all vegetables are equally beginner-friendly. Starting with easy, fast-growing crops builds your confidence and gives you quick results.
Best vegetables for beginner home gardens:
| Vegetable | Time to Harvest | Difficulty |
|---|---|---|
| Lettuce & salad greens | 4–6 weeks | Very Easy |
| Radishes | 3–4 weeks | Very Easy |
| Cherry tomatoes | 8–12 weeks | Easy |
| Beans (dwarf variety) | 8–10 weeks | Easy |
| Courgette / Zucchini | 6–8 weeks | Easy |
| Cucumber | 8–10 weeks | Moderate |
| Basil, mint, parsley | 4–6 weeks | Very Easy |
| Spring onions | 5–8 weeks | Very Easy |
How many plants to start with?
A common beginner mistake is planting too much, getting overwhelmed, and letting things fail. Start small:
- For one person: 2–3 types of vegetables, 3–5 plants each
- For a family: 4–6 types, 5–8 plants each
You can always expand next season once you understand how your space works.
Step 3: Understand Your Soil
Good soil is the foundation of a productive garden. Vegetables need soil that:
- Drains well (doesn’t stay waterlogged)
- Holds some moisture (doesn’t dry out instantly)
- Is rich in nutrients (especially nitrogen, phosphorus, and potassium)
- Is loose and aerated (roots need to breathe)
Testing your soil quality (simple method):
Take a handful of soil and squeeze it. When you open your hand:
- Falls apart immediately → too sandy, won’t hold water
- Holds shape and cracks → good loamy soil
- Holds shape and feels sticky → too much clay, needs amendment
How to improve your soil before planting:
- Add compost — the single best thing you can do. Mix in a 5–10cm layer of compost into the top 20cm of soil. This improves drainage, adds nutrients, and feeds beneficial microbes.
- Add organic matter — leaf mould, well-rotted manure, or coco coir all help improve soil structure.
- Avoid compacting it — never walk on your growing area. Create stepping stones or access paths if you have a larger bed.
For raised beds or containers:
Use a purpose-made vegetable compost mix. A good formula is:
- 60% topsoil or good garden soil
- 30% compost
- 10% perlite or coarse sand (for drainage)
Step 4: Plan Your Garden Layout
Before you plant anything, sketch a rough plan. This prevents common mistakes like:
- Tall plants shading smaller ones
- Planting too close together (causes poor airflow → disease)
- Forgetting to leave space to water and harvest
Spacing basics:
- Lettuce and salad greens: 15–20cm apart
- Tomatoes: 50–60cm apart
- Courgettes: 60–90cm apart (they get big)
- Herbs: 20–30cm apart
Companion planting (a quick trick):
Some vegetables actually help each other when grown nearby:
- Tomatoes + basil — basil is said to repel aphids and improve tomato flavour
- Carrots + onions — repel each other’s pests naturally
- Beans + most vegetables — beans fix nitrogen in soil, benefiting neighbours
Step 5: Decide — Seeds or Seedlings?
You can either start from seed or buy young plants (seedlings/transplants) from a garden centre.
Seeds:
Pros: Cheaper, more variety choice, more satisfying
Cons: Takes longer, needs more attention early on
Best for: Beans, lettuce, radishes, courgettes, cucumbers (these germinate easily)
Seedlings/transplants:
Pros: Faster results, easier to manage, better for short growing seasons
Cons: More expensive per plant, less variety
Best for: Tomatoes, peppers, aubergines (these take long to mature from seed)
Beginner recommendation: Buy tomato and pepper seedlings, start lettuce and beans from seed. Best of both worlds.
Step 6: Plant Your Vegetables Correctly
The right planting technique makes a big difference in how well your plants establish.
Step-by-step planting process:
- Water your plants or seedlings before planting — never plant into dry soil
- Dig a hole slightly larger than the root ball
- For seedlings: Place in the hole so the top of the root ball is level with the soil surface. For tomatoes, you can plant them slightly deeper — they grow roots along their buried stem.
- Backfill gently and firm the soil around the base
- Water thoroughly immediately after planting
- Mulch around the plant (2–5cm of straw, wood chip, or compost) to retain moisture and suppress weeds
Starting seeds outdoors:
- Create shallow furrows (grooves) in the soil according to the seed packet depth — usually 0.5–2cm
- Sow seeds thinly along the row
- Cover lightly with soil and water gently
- Label each row clearly — you won’t remember what’s what in two weeks
Step 7: Water Your Garden the Right Way
Overwatering and underwatering are the two most common beginner mistakes. Getting this right matters more than almost anything else.
General watering rules:
- Water deeply and less frequently — this encourages roots to grow deep into the soil, making plants more drought-resistant. Aim for 2–3 times a week rather than a little every day.
- Water at the base of the plant, not the leaves — wet leaves invite disease and fungal issues.
- Water in the morning — gives leaves time to dry before evening, and reduces evaporation vs. midday watering.
How to check if your plants need water:
Push your finger 2–3cm into the soil near the plant. If it’s:
- Dry → water now
- Slightly moist → check again tomorrow
- Wet → hold off, risk of overwatering
Signs of overwatering:
- Yellowing leaves
- Wilting despite wet soil
- Mould or algae on soil surface
- Root rot smell
Signs of underwatering:
- Drooping/wilting leaves during the day
- Dry, cracked soil surface
- Dry, crispy leaf edges
Step 8: Feed Your Plants Through the Season
Compost gives a good nutrient foundation, but most vegetables are hungry plants that will benefit from additional feeding once they start growing actively.
Feeding schedule for beginners:
- Weeks 1–3 after planting: No feeding needed if you prepared soil with compost
- Week 4 onwards: Begin feeding every 2 weeks with a balanced liquid fertiliser (look for equal N-P-K numbers, like 5-5-5)
- Tomatoes, peppers, and fruiting crops: Switch to a high-potassium fertiliser once flowers appear (tomato feed works well) — this boosts fruit production
Simple organic options:
- Compost tea (steep compost in water overnight, strain, and apply)
- Worm castings (mix into soil around plants)
- Seaweed extract (great all-rounder, good for plant resilience)
Step 9: Deal With Common Pests and Problems
Every gardener deals with pests. The key is catching problems early, before they spread.
Most common garden pests:
Aphids — tiny green or black insects clustering on new growth and undersides of leaves
Fix: Blast off with water, use insecticidal soap spray, or introduce ladybirds
Slugs and snails — mainly attack seedlings and soft leaves, especially after rain
Fix: Copper tape around containers, crushed eggshells around plants, go out at night and remove them by hand
Whitefly — tiny white flies on the underside of leaves, sap-sucking
Fix: Yellow sticky traps, insecticidal soap, neem oil spray
Caterpillars — chewed leaves, visible frass (droppings)
Fix: Pick off by hand, use fine mesh netting to keep butterflies from laying eggs
Simple prevention rules:
- Keep beds weed-free — weeds harbour pests and compete for nutrients
- Don’t overcrowd plants — good airflow reduces disease
- Rotate crops each year — don’t grow the same family of vegetable in the same spot two years running
Step 10: Harvest at the Right Time
This is the most rewarding part — and also one where beginners often wait too long.
General harvesting tips:
- Harvest regularly — picking encourages more production. Leaving vegetables on the plant too long signals it to stop producing.
- Pick in the morning — vegetables are at their best before the heat of the day
- When in doubt, taste — a tomato that comes off the vine easily and tastes sweet is ready
Signs of readiness by vegetable:
- Tomatoes: Fully coloured (red, yellow, etc.), slightly soft to touch, comes off vine with gentle twist
- Lettuce/salad greens: Pick outer leaves when 10–15cm long, leave inner leaves to continue growing
- Courgette/Zucchini: Best at 15–20cm — don’t let them become marrows
- Beans: Pods should feel firm with visible beans inside, but not bulging
- Cucumbers: Firm, evenly coloured; cut with a knife or scissors, don’t yank
Common Beginner Mistakes to Avoid
Learning from others’ mistakes is a lot easier than making your own:
- Planting too much, too soon — start small, grow your confidence with the space
- Ignoring the seed packet — spacing and depth instructions exist for good reason
- Watering on a schedule instead of checking soil — check moisture first, then decide
- Planting in too much shade — if plants are leggy and pale, they need more sun
- Giving up after one failure — every gardener loses plants. It’s part of the process. Note what happened and adjust next season.
Frequently Asked Questions
Q: What is the easiest vegetable to grow at home for beginners?
Lettuce, radishes, and spring onions are the easiest vegetables to start with. They germinate quickly, grow fast, and tolerate minor mistakes in watering and sunlight. Courgettes are also very forgiving and produce heavily.
Q: How much space do I need to start a vegetable garden?
You can start a productive vegetable garden in as little as 1 square metre. A 1m × 2m raised bed or a few large containers on a balcony is enough to grow salad greens, herbs, and cherry tomatoes simultaneously.
Q: When should I start planting my vegetable garden?
In temperate climates, most vegetables are planted outdoors after the last frost — typically between March and May. Hardy vegetables like lettuce, spinach, and peas can go out earlier. Check your last frost date and the seed packet instructions for your specific region.
Q: How often should I water a vegetable garden?
Most vegetable gardens need watering 2–3 times per week, depending on weather and soil type. The best method is to check the soil with your finger — water when the top 2–3cm feels dry. Avoid watering on a fixed daily schedule.
Q: Do I need to use chemical fertilisers?
No. A good quality compost, combined with organic liquid feeds like seaweed extract or compost tea, is enough to grow a productive vegetable garden without synthetic chemicals. Many home gardeners prefer organic methods and achieve excellent results.
Q: Can I grow vegetables in pots and containers?
Yes — many vegetables grow extremely well in containers. Cherry tomatoes, lettuce, herbs, peppers, beans, and spring onions are all well-suited to pot growing. Use the largest container you can, ensure good drainage holes, and feed more regularly than in-ground plants (nutrients wash out faster with watering).
Final Thoughts
Starting a vegetable garden at home is one of the most rewarding things you can do with a patch of outdoor space — or even just a sunny windowsill. The key for beginners is to start small, choose easy crops, and pay attention to the basics: sunlight, soil, and water.
You don’t need to get everything perfect in your first season. Every growing season teaches you something new about your soil, your local climate, and which vegetables thrive best in your specific space.
Start with 3–4 plants, get comfortable with the rhythm of checking, watering, and harvesting — and by next year, you’ll be ready to expand.
Explore more on plantcarehacks.com.