
Pineapple Plant: How to Grow a Pineapple Indoors
Tags: ananas comosus, growing pineapple indoors, how to grow a pineapple, how to grow pineapple from top, pineapple plant, pineapple plant care, pineapple plant fruit, pineapple plants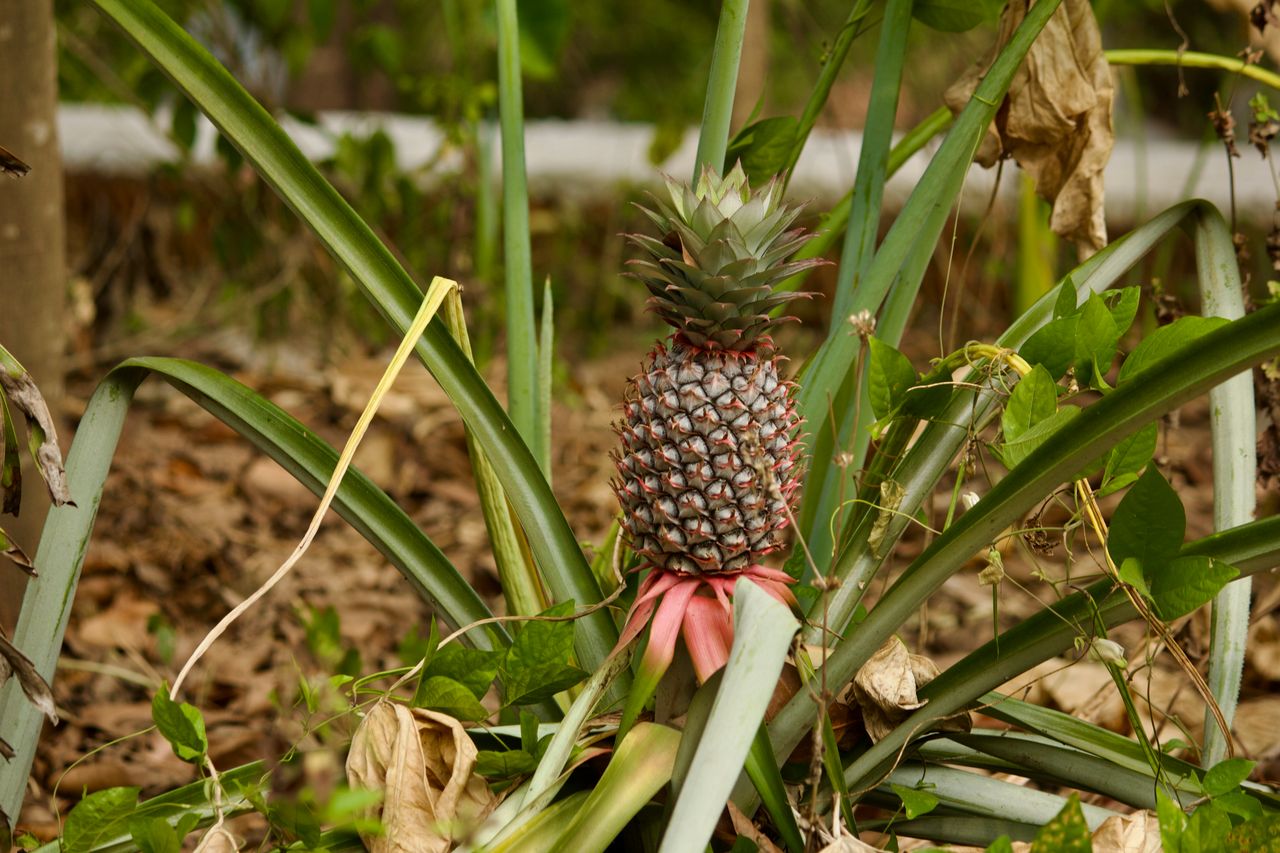
Here’s a project that costs $3, takes about 10 minutes, and produces one of the most satisfying results in all of home gardening: growing a pineapple plant from the top of a fruit you bought at the grocery store.
Yes, that actually works. And yes, under the right conditions, that plant will eventually produce real, edible pineapple fruit.
But there’s far more to the pineapple plant than the endlessly shared “twist off the top and put it in water” tip. The pineapple (Ananas comosus) is one of the most fascinating botanical subjects in the plant world — a bromeliad with a remarkable history, extraordinary biology, a fruit that is itself a scientific curiosity, and specific care requirements that most indoor growing guides get only partially right.
This guide covers everything with the depth and specificity that produces real results: the history and biology competitors skip, all five growing methods explained properly, the complete care system, the step-by-step fruiting protocol, and the tricks that actually accelerate indoor pineapple production.
Table of Contents
- What Is a Pineapple Plant? Biology & Classification
- The Pineapple as a Bromeliad: What That Changes About Care
- The Pineapple Fruit: A Syncarp of Fused Flowers (The Biology Nobody Explains)
- Pineapple History: The Most Status-Conscious Fruit in Western History
- Pineapple as Houseplant: What to Expect Honestly
- Pineapple Varieties: Which One Are You Growing?
- The 5 Methods for Growing a Pineapple Plant
- Method 1: Crown Growing (From Store-Bought Fruit) — Step by Step
- Light Requirements
- Watering the Pineapple Plant
- Soil, pH & Drainage
- Fertilizing: The Foliar Feeding Advantage
- Temperature & Humidity
- The Monocarpic Cycle: What Happens After Fruiting
- How to Force a Pineapple to Flower: The Ethylene Gas Method
- The 18-Month Indoor Fruiting Timeline
- How to Know When Your Pineapple Is Ripe
- Repotting
- Common Pineapple Plant Problems & Solutions
- Pests on Pineapple Plants
- Outdoor Growing by US Zone
- Frequently Asked Questions
1. What Is a Pineapple Plant? Biology & Classification
The pineapple (Ananas comosus) is a tropical plant native to South America — specifically the region spanning southern Brazil and Paraguay, from where it spread through Central America and the Caribbean long before European contact. Indigenous peoples of the Tupi and Guaraní language groups cultivated pineapples for food, fiber (from the leaves), and wine for centuries before Columbus encountered the fruit.
Scientific classification:
- Family: Bromeliaceae (the bromeliad family)
- Genus: Ananas
- Species: Ananas comosus
- The word “Ananas” comes from nanas, the Tupi word for the fruit — meaning “excellent fruit”
The name “pineapple” was given by European explorers in the 17th century because the fruit resembled a pinecone — the only prior reference frame they had for a large, scaled, roughly oval structure growing on a plant. The name stuck in English while most other languages retained some version of “ananas.”
2. The Pineapple as a Bromeliad: What That Changes About Care
The pineapple is the only bromeliad cultivated commercially for edible fruit — and understanding that it’s a bromeliad changes several important care decisions.
The Bromeliad Tank System
Most bromeliads are tank bromeliads — their rosette of leaves forms a central cup (called the “tank” or “vase”) that collects water and organic debris in their natural rainforest habitat. This tank provides both water and nutrients to the plant through the leaf tissue rather than exclusively through the root system.
Pineapple plants have a central rosette that functions in the same way. Filling the central cup with water is a legitimate and beneficial care technique — the plant absorbs moisture and dissolved nutrients directly through the leaf bases surrounding the tank.
What Bromeliads Teach Us About Pineapple Roots
Bromeliad root systems are primarily anchoring structures rather than primary nutrient and moisture uptake organs. In bromeliads, the leaves and tank do much of the work that roots do in most other plants. This explains why:
- Pineapple plants tolerate drought better than their large leaf area might suggest
- Foliar fertilizing (spraying diluted fertilizer on the leaves) is particularly effective — see Section 12
- Root rot from overwatering is a serious risk even though the plant looks tropical
- Pineapple plants can be grown in relatively small containers because the root system doesn’t need to be proportional to the foliage mass in the way it would for a non-bromeliad
3. The Pineapple Fruit: A Syncarp of Fused Flowers
Here is the biological fact about pineapples that most people have never heard — and that permanently changes how you look at the fruit:
A pineapple is not a single fruit. It is a syncarp — a fusion of 100 to 200 individual berries, each developing from a separate flower, all fused together into one composite structure.
Each of the “eyes” you see on the surface of a pineapple — those rectangular, slightly raised or indented sections in the characteristic diamond pattern — is the remnant of one individual flower and its associated fruitlet. Every scale on a pineapple’s surface was once its own small flower. The entire pineapple fruit is what happens when all 100-200 of those flowers develop simultaneously and fuse into one mass.
The Fibonacci Sequence on Your Pineapple
Look at the diagonal rows of eyes on any pineapple and count them in two directions. You will find that the number of spirals going one direction and the number going the other direction are always consecutive Fibonacci numbers — typically 8 and 13, or 13 and 21. This is the same mathematical pattern visible in sunflower seed heads, pine cone scales, and dozens of other natural structures. It emerges from the underlying spiral phyllotaxis (the mathematical arrangement of leaf and flower development) that optimizes packing efficiency in the growing structure.
This pattern — the Fibonacci sequence expressed in a living plant — is one of the most visually accessible examples of mathematical order in nature. It’s visible in the fruit sitting on your kitchen counter.
4. Pineapple History: The Most Status-Conscious Fruit in Western History
No guide to the pineapple plant is complete without this history — because understanding how the pineapple was received in Western culture explains a great deal about why it remains so recognizable and beloved as a cultural symbol today.
Columbus and the First European Encounter
Christopher Columbus encountered the pineapple in 1493 during his second voyage, on the Caribbean island of Guadeloupe, where it had been brought from South American trade networks. Spanish explorers described it as looking like a pinecone but tasting like a combination of quince and melon — something entirely unlike anything in European culinary experience. Columbus brought specimens back to Spain, beginning the fruit’s introduction to European culture.
The Royal Pineapple Obsession
Throughout the 17th and 18th centuries, the pineapple became the most status-laden food item in European and early American culture. The reasons were purely economic: tropical pineapples could not be grown in Europe’s climate and took years to produce fruit in expensive greenhouse “pineapple pits” — heated forcing houses built specifically to grow pineapples for aristocratic consumption. A single pineapple produced in an English greenhouse in the 18th century represented months of skilled labor and significant fuel expense.
King Charles II of England had a formal portrait painted of himself receiving a pineapple — the act of being presented with a pineapple was considered worthy of royal commemoration.
The Pineapple Rental Industry
Here’s the detail that most astonishes modern readers: in 18th century Britain, you could rent a pineapple — for the evening.
The fruit was so expensive and so recognizable a status symbol that wealthy hosts would rent a real pineapple from specialist suppliers to display at dinner parties and social gatherings, signaling their prosperity and sophistication to guests. The same pineapple would be rented out to multiple events over its lifespan, finally being sold for actual consumption once it was overripe.
Pineapple as a Symbol of Hospitality
In American colonial culture, the pineapple became the symbol of hospitality and welcome. Sea captains returning from voyages to the Caribbean and South America would bring back pineapples and impale them on the gateposts of their homes — signaling to neighbors that they had returned and were receiving visitors. From this tradition evolved the pervasive use of pineapple motifs in American architecture, decorative arts, and domestic objects.
Pineapple finials — carved pineapple forms atop bedposts, gates, newel posts, and architectural elements — remain one of the most recognizable decorative motifs in American colonial and traditional architecture. You’ll find them on the gates of the White House, on the architecture of Williamsburg, Virginia, and in the decorative metalwork of countless historic American homes.
Modern Symbolism
Today, the pineapple continues to carry symbolism of welcome, hospitality, warmth, and good cheer — an association directly traceable to those colonial-era gateposts. In modern interior design, pineapple motifs signal a warm, welcoming home aesthetic. Growing a real pineapple plant continues this tradition in the most direct way possible.
5. Pineapple as Houseplant: What to Expect Honestly
Before starting, a realistic expectation-setting that most guides skip:
The pineapple plant is primarily an architectural, ornamental houseplant that may eventually produce fruit. Thinking of it first as a fascinating, beautiful tropical plant — and secondarily as a fruit-producing project — leads to much more satisfying results than expecting quick fruit production and being disappointed.
What you will get: A striking, rosette-form tropical plant with bold, sword-shaped leaves, handsome structure, and significant visual presence. A genuinely rewarding growing project that connects you to the plant from a $3 grocery store fruit to a mature specimen.
What takes time: Fruiting. Under indoor home conditions, a pineapple plant takes 18 months to 3 years to produce fruit from a newly rooted crown. The first year is root establishment. The second year is vegetative growth. Flowering and fruiting happen in the third year naturally, or can be triggered earlier with the ethylene method (Section 15).
The reward: When you do harvest a homegrown pineapple from a plant you started from a grocery store crown, it is genuinely one of the most satisfying moments in home gardening.
6. Pineapple Varieties: Which One Are You Growing?
Ananas comosus — Common Pineapple
The standard edible pineapple in all its commercial varieties. Several cultivars are relevant to home growers:
‘Smooth Cayenne’: The most common commercial variety in the USA — the pineapple in most American grocery stores. Golden-yellow flesh, sweet-tart flavor, smooth-edged leaves. This is what most people grow from a store-bought crown.
‘Sugarloaf’ / ‘White Pineapple’: A specialty variety with white flesh, very sweet flavor, and minimal acidity. Less common in regular grocery stores — more likely found at specialty markets or Caribbean grocers. Excellent for home growing.
‘Red Spanish’: Common in Caribbean and Latin American markets. Smaller fruit, more fibrous flesh, distinctive reddish exterior. Widely available in US Latino grocery stores.
‘MD-2’ (Del Monte Gold): The sweeter yellow pineapple increasingly sold alongside traditional varieties at major US grocery chains. Particularly sweet, less acidic, higher beta-carotene content (explains the deeper golden color).
Ananas comosus var. bracteatus — Red Pineapple (Ornamental)
An ornamental variety grown specifically for its striking red-and-green striped foliage rather than for edible fruit. Produces small, ornamental pineapples with brilliant red coloration. Sold as a houseplant at nurseries and specialty retailers — the decorative pineapple plants you see in home décor contexts are often this variety.
Dwarf Varieties
Several compact varieties exist specifically for container and indoor growing, including ‘Pigmy’ and specialty dwarf forms. These reach 2–3 feet rather than the full-size 3–5 feet of standard varieties.
7. The 5 Methods for Growing a Pineapple Plant
Most guides cover only the crown method. Here are all five approaches with honest assessments of each:
Method 1: Crown (From Store-Bought Fruit)
The most accessible method. The leafy top of any pineapple contains a growing point that, when properly prepared and rooted, becomes a complete new plant. This method starts with the $3 grocery store pineapple. See Section 8 for the full step-by-step.
Timeline: 2–3 years to fruit from crown rooting.
Method 2: Slips (Plantlets at the Base of the Fruit)
When a pineapple plant produces fruit, small plantlets sometimes develop at the base of the fruit itself — growing directly on the stem just below the fruit. These are called slips. Because slips develop close to the fruit, they are physiologically more “mature” than crown-grown plants and typically fruit significantly faster.
How to use slips: Detach slips from the fruit stem by twisting and pulling. Allow the base to dry for 1–2 days. Plant directly in well-draining pineapple mix. No water rooting needed.
Timeline: 12–18 months to fruit — the fastest method.
Finding slips: Not every store-bought pineapple has slips. Look for them at farmers markets and specialty grocers where pineapples are sold with more stem attached.
Method 3: Ratoons (Suckers/Pups from the Mother Plant)
Pineapple plants produce ratoons — offshoots or pups that emerge from the base of the plant, particularly after fruiting. These are genetically identical to the mother plant and produce fruit in the same timeline as slips.
How to use ratoons: Allow the pup to reach 6–8 inches tall before removing. Twist or cut off at the base. Allow to dry 1–2 days. Plant directly in pineapple mix.
Timeline: 12–18 months to fruit.
Note: This is the primary propagation method once you have an established plant — the mother plant produces multiple ratoons after fruiting, effectively replacing herself and continuing the cycle.
Method 4: Hapas (Stem Suckers)
Hapas are suckers that develop from the stem between the soil and the fruit — on the main fruiting stalk itself rather than at the plant’s base. They are similar to ratoons but grow higher on the plant.
How to use hapas: Remove when 6–8 inches tall. Dry briefly. Plant in pineapple mix.
Timeline: Approximately 16–24 months to fruit.
Method 5: Seeds (Essentially Impractical for Commercial Varieties)
Pineapples can be grown from seeds — but there’s a significant catch: most commercial pineapple varieties are essentially seedless because they were developed and selected for the absence of seeds (which consumers find unpleasant in the fruit). The fruit is produced through a process called parthenocarpy — development without fertilization, producing the fruit without seed formation.
Finding truly seeded pineapple varieties for growing is challenging in the US market. The few seeds occasionally found in store-bought pineapples are typically non-viable or weakly viable. Germination is slow and unreliable, and seed-grown plants take 4–6 years to fruit.
Verdict: Seeds are biologically possible but practically impractical for home growing. Start with one of the other four methods.
8. Method 1: Crown Growing — Complete Step-by-Step
This is the method almost everyone starts with, and it works — when done correctly.
What You Need
- One fresh, healthy pineapple (avoid pineapples with yellowed or brown crowns — a healthy green crown is essential)
- A sharp knife
- A glass or mason jar for initial water rooting
- A pot (6–8 inch diameter, terracotta preferred)
- Pineapple-appropriate potting mix (see Section 11)
Step 1: Select and Remove the Crown
Choose a pineapple with a firm, green, healthy crown — not yellowed or dried. The healthier the crown, the higher the rooting success rate.
To remove the crown, you have two options:
Option A (Twisting method): Grasp the entire crown with one hand and the fruit with the other. Twist firmly while pulling slightly upward. The crown detaches cleanly at the base.
Option B (Cutting method): Cut the top inch of the fruit off with the crown still attached, then carefully slice away the fruit flesh from around the base of the crown, leaving only the central stem and leaf bases.
The twisting method is faster but can sometimes leave the base slightly irregular. The cutting method gives you cleaner control over the crown’s base preparation.
Step 2: Prepare the Crown
This step is critical and frequently rushed:
Remove the lower leaves: Peel away the small leaves from the bottom 1–2 inches of the crown stem, revealing the smooth stem beneath. These leaf bases, if left in soil or water, will rot.
Remove any attached fruit flesh: If any pineapple fruit remains at the crown’s base, trim it completely away with a knife. Any remaining fruit will rot and potentially infect the growing point.
Look for root primordia: After removing the lower leaves, examine the exposed stem closely. You may see tiny brown bumps — these are root primordia, the pre-formed root structures that will develop into roots. Their presence is a very good sign.
Allow to dry: Leave the prepared crown in a dry, ventilated location for 1–2 days. This allows the cut surfaces to callous over — dramatically reducing rot risk during rooting.
Step 3: Root in Water
Fill a glass or mason jar with room-temperature water. Place the prepared crown so the exposed stem base is submerged approximately 1 inch — the leaf bases should be above the waterline.
Position: Near your sunniest window — a south or west-facing windowsill is ideal.
Change the water: Every 5–7 days — fresh water prevents bacterial buildup.
Watch for roots: White roots typically emerge from the stem base within 2–4 weeks. Some crowns take up to 6 weeks, particularly in cooler conditions.
When to move to soil: When roots reach 1–2 inches in length — typically 4–8 weeks after placing in water.
Step 4: Transfer to Soil
Fill a 6–8 inch terracotta pot with pineapple potting mix (Section 11). Make a hole in the center for the rooted crown. Place the crown with roots spread gently outward. Firm the soil around the base — the bottom of the leaf rosette should sit just at soil level, not buried.
Water gently — just enough to settle the soil. Then allow the surface to dry slightly before the next watering.
First month care: Keep in a consistently warm (70–85°F), bright location. The plant is establishing its root system and will show little above-ground growth for 4–8 weeks — this is normal. A slight wobble when you gently tug the crown indicates roots haven’t fully established; firm resistance indicates successful rooting.
For complete propagation guidance applicable to all plants, see our DIY propagation station guide.
9. Light Requirements
Pineapple plants are high-light plants — among the highest-light-demanding common houseplants. This reflects their South American tropical origin where intense, full sun is the norm.
Minimum: 6 hours of bright light daily. Below this, growth is very slow and fruiting becomes essentially impossible.
Optimal: 8+ hours of bright, direct or near-direct light. South-facing windows in the USA provide the best natural light for pineapple plants.
The window position hierarchy for pineapple:
- South-facing window (best): Maximum natural light in US homes. Place directly at the window.
- West-facing window (good): Strong afternoon direct sun. Place directly at the window.
- East-facing window (adequate): Morning direct sun, good indirect light. Acceptable for growth; fruiting is slower.
- North-facing window (insufficient): Pineapple plants decline in north-facing positions. Grow light is essential.
Grow Light Settings for Pineapple
Pineapple plants respond exceptionally well to grow lights — better than many other common houseplants because of their high light tolerance.
- Adequate for growth: 600–800 FC / 120–160 μmol/m²/s for 14 hours daily
- For fruiting: 1,000–1,500 FC / 200+ μmol/m²/s for 16 hours daily
- Full-spectrum white LED is recommended
The higher the light intensity you can provide, the faster your pineapple grows and the more likely it is to fruit without artificial ethylene treatment. See our complete grow lights guide.
10. Watering the Pineapple Plant
Soil Watering
Pineapple plants are more drought-tolerant than their tropical appearance suggests — a direct result of their bromeliad adaptation and their fleshy, moisture-storing leaves.
Target: Water when the top 1–2 inches of soil are dry. Allow this partial drying between waterings — unlike moisture-loving tropicals, pineapple roots are highly susceptible to rot in chronically moist soil.
How to water: Water thoroughly until it flows from drainage holes. Then wait until the top inch or two dries before watering again.
Never leave the plant sitting in standing water — the bromeliad root system has no tolerance for waterlogged conditions.
Tank (Central Rosette) Watering
The central cup formed by the rosette of leaves can be filled with water — the plant absorbs moisture and dissolved nutrients directly through the leaf tissue surrounding the tank. This mimics the bromeliad’s natural water-collection system.
How to use the tank:
- Pour water directly into the center of the rosette until it fills to the leaf margins
- Replace the water in the tank every 2–3 weeks — stagnant water in the tank promotes bacterial growth and mosquito breeding
- Periodically flush the tank completely with fresh water to prevent salt and mineral buildup from accumulated dissolved nutrients
Tank tip: If you add diluted liquid fertilizer to the tank water (at quarter strength), the plant absorbs nutrients directly through the leaf tissue — a particularly efficient delivery method for bromeliads. See Section 12.
For the complete plant-responsive watering framework, see our guide to watering indoor plants.
11. Soil, pH & Drainage
The Pineapple Soil Formula
Pineapple plants have specific soil requirements that differ meaningfully from standard tropical houseplant mixes:
The two most critical requirements:
1. Fast drainage: Pineapple roots cannot tolerate standing moisture. The soil must drain rapidly after watering and dry partially before the next irrigation.
2. Acidic pH (4.5–6.5): Pineapples evolved in naturally acidic South American soils. At pH above 7.0, nutrient uptake is impaired and growth suffers. Standard neutral potting mixes (pH 6.5–7.0) are marginal; mixes drifting alkaline actively harm the plant.
Recommended soil mix:
- 40% quality potting mix
- 30% perlite
- 20% orchid bark or coconut coir
- 10% coarse sand
Commercial alternative: Cactus/succulent potting mix works well for pineapples — its fast-draining, lower-pH formulation suits the pineapple’s needs well.
What to avoid:
- Dense, moisture-retentive mixes (standard potting mix without amendment)
- Any mix high in calcium — pineapples struggle in calcium-rich substrates
- Garden soil — too dense, too alkaline, introduces pests
- Mixes with added limestone (raises pH)
Checking and adjusting soil pH: An inexpensive soil pH meter (widely available at US garden centers and Amazon for $10–$20) allows you to confirm your mix is in the correct range. To lower pH if needed: add elemental sulfur to the soil mix or use an acidifying fertilizer.
12. Fertilizing: The Foliar Feeding Advantage
Pineapple fertilizing has an important distinction from most houseplants: pineapples absorb nutrients efficiently through their leaves — a bromeliad characteristic that makes foliar feeding (spraying diluted fertilizer directly on the leaves and into the tank) particularly effective.
Fertilizer Type
A balanced fertilizer with equal NPK (such as 10-10-10 or 20-20-20) covers the pineapple’s nutritional needs throughout its vegetative growth phase.
For fruit development: As flowering approaches and during fruit development, switch to a fertilizer with a slightly higher middle number (phosphorus) — such as 5-10-5 or similar bloom-boosting formula.
Avoid high-calcium fertilizers: As noted in Section 11, pineapples don’t perform well with calcium-heavy nutrition. Check fertilizer labels and avoid products with significant added calcium.
The Foliar Feeding Technique
Prepare: Dilute liquid fertilizer to quarter the recommended strength — much more dilute than for soil application.
Apply: Using a spray bottle, mist the entire plant — leaf surfaces above and below, and fill the central tank with the diluted fertilizer solution.
Timing: Apply in the morning so the foliage dries during the day, reducing fungal disease risk.
Frequency: Every 2–3 weeks during spring and summer.
Combined Soil + Foliar Schedule
Spring and Summer (active growth):
- Soil drench with balanced fertilizer at half strength: every 4 weeks
- Foliar spray with balanced fertilizer at quarter strength: every 2–3 weeks
- If tank filling: add quarter-strength fertilizer to tank water
Fall:
- Reduce to soil drench every 6–8 weeks
- Foliar spray monthly
Winter:
- Minimal or no fertilization during low-light, slow-growth months
- Resume in late February/early March as light increases
13. Temperature & Humidity
Temperature
Ideal growing range: 68–86°F (20–30°C) — the tropical warmth the pineapple evolved in.
Minimum: 60°F (15°C). Below this, growth slows dramatically. Below 50°F (10°C), the plant suffers leaf damage. Frost kills pineapple plants.
Cold sensitivity: The pineapple has essentially no frost tolerance. In all US climate zones except 10–12, pineapple plants must either be permanent indoor houseplants or brought inside before temperatures drop below 55°F.
Heat tolerance: Pineapple plants handle heat well — up to 90°F (32°C) with adequate water. At very high temperatures, ensure the soil doesn’t dry out too rapidly.
Consistency: Avoid cold drafts, HVAC vents, and frequent temperature fluctuations. Consistent warmth drives the steady growth rate that leads to fruiting.
Humidity
Pineapple plants are considerably more humidity-tolerant than many tropical plants — they evolved to handle the variable humidity of South American environments ranging from coastal to highland.
Preferred: 40–60% relative humidity — typical US home conditions.
Tolerates: Lower humidity better than most tropicals, though very dry air (below 30%) during winter heating season can cause leaf tip browning.
14. The Monocarpic Cycle: What Happens After Fruiting
This is crucial information that most guides mention briefly but never explain properly:
The pineapple plant is monocarpic — the main rosette (the plant you grew) dies after producing its single fruit.
This is not a care failure. It’s the pineapple’s fundamental reproductive biology. After investing all its energy reserves into producing one fruit, the mother rosette has completed its lifecycle. The plant’s energy now shifts to producing the next generation — the ratoons (pups) that emerge from its base.
The Post-Fruiting Cycle
Step 1 — After harvest: The mother plant begins to deteriorate — leaves yellow from the base upward over several weeks to months.
Step 2 — Ratoon emergence: Simultaneously, ratoon pups emerge and grow from the base of the dying mother plant. A healthy pineapple mother plant typically produces 2–5 ratoons.
Step 3 — Ratoon development: Allow the ratoons to develop to 6–8 inches tall before detaching. At this size, they have enough leaf area to sustain themselves.
Step 4 — Separate and pot: Detach ratoons (twist and pull, or cut with a clean knife at the base). Allow cut surfaces to dry for 1–2 days. Pot in fresh pineapple mix.
Step 5 — Repeat the cycle: Each ratoon becomes a new plant that will eventually produce its own fruit and its own ratoons. One pineapple plant, properly managed, produces descendants indefinitely.
15. How to Force a Pineapple to Flower: The Ethylene Gas Method
If your pineapple plant has reached mature size (at least 12–15 leaves, plant diameter of 12+ inches) and has been growing for more than 12 months but hasn’t flowered naturally, you can trigger flowering artificially using ethylene gas — the same plant hormone that ripens fruit.
The Science Behind It
Ethylene (C₂H₄) is a gaseous plant hormone that plays multiple roles in plant development — including, in bromeliads, triggering the physiological cascade that leads to floral initiation. Commercial pineapple growers use ethephon (a synthetic ethylene-releasing compound) to synchronize flowering across their crops. At home, you can use natural ethylene sources.
The Apple Method (Most Accessible)
What you need: 2–3 ripe apples (ripe apples produce significant ethylene), a large clear plastic bag.
Step 1: Ensure your pineapple plant’s central tank is empty of water — water dilutes the ethylene concentration.
Step 2: Place 2–3 ripe apples in the bag alongside — not on top of — the pineapple plant. The bag should be loose enough to encompass the entire plant and apples without crushing the leaves.
Step 3: Seal the bag tightly and leave in place for 4–5 days.
Step 4: Remove the apples and bag. The plant has been exposed to ethylene concentrations sufficient to trigger floral initiation.
Step 5: Wait 6–8 weeks. A red-tinged growth point will appear in the center of the rosette — this is the emerging flower stalk. Your pineapple is on its way to fruiting.
Success rate: Approximately 70–80% success rate with a properly mature, healthy plant. Less mature plants may not respond. Repeat the process after 6–8 weeks if no flower stalk appears.
The Calcium Carbide Method
A more reliable but slightly more involved method uses calcium carbide pellets dissolved in water. The reaction produces acetylene gas, which has similar ethylene effects on bromeliads. Pour the solution into the central tank of the plant and bag loosely for 24–48 hours.
Calcium carbide is available at some garden supply stores and online in the USA, but requires careful handling — it reacts vigorously with water and the acetylene produced is flammable. Follow safety instructions precisely.
16. The 18-Month Indoor Fruiting Timeline
Here is the complete, stage-by-stage breakdown of what happens from a freshly rooted crown to a ripe homegrown pineapple:
Months 1–3: Root Establishment
The rooted crown is focused entirely on establishing a functional root system. Above-ground growth is minimal or invisible. The plant may produce a small new leaf or two. This is the period when the most neglect-related deaths occur — owners interpret the lack of visible growth as failure.
What’s happening: Root elongation and establishment. The more you can provide warm temperatures and bright light during this period, the faster root establishment proceeds.
Care focus: Correct soil moisture (don’t overwater the newly planted crown), warmth, maximum light.
Months 3–12: Vegetative Growth
The established plant begins producing new leaves from the center — the growing point at the base of the central rosette. New leaves emerge tightly rolled from the center and uncurl as they grow. Healthy growth rate: 1–3 new leaves per month during spring and summer.
By the end of this phase, the plant should have 12–20 leaves and be 12–18 inches in diameter — approaching the size at which natural or induced flowering becomes possible.
Care focus: Consistent light, regular foliar and soil fertilization, appropriate watering.
Months 12–18: Maturity & Flowering
Either naturally or through ethylene treatment (Section 15), the mature plant initiates flowering. The flower stalk — the inflorescence — emerges from the center of the rosette over 3–4 weeks. The stalk elongates, then reveals a compact cluster of small purple-blue flowers along its length, each encircled by a red bract.
The flowers open progressively from the base upward over approximately 2–3 weeks.
What you’ll see: After flowering, the familiar pineapple fruit shape begins developing — the syncarp of fused fruitlets growing directly from the top of the flower stalk. This is your future pineapple.
Months 18–24: Fruit Development
The developing fruit grows steadily over 4–6 months from the beginning of flowering to full ripeness. Growth is visible week to week during this phase — one of the most satisfying aspects of home pineapple growing. The fruit begins green and gradually transitions to yellow/gold as it ripens.
Care focus: Continue regular watering and fertilization throughout fruit development — the developing fruit demands significant nutrients and consistent moisture.
17. How to Know When Your Pineapple Is Ripe
The smell test (most reliable): A ripe pineapple smells distinctly sweet and tropical at the base. Unripe fruit has no meaningful scent. Move your face close to where the fruit connects to the stalk — if you can smell pineapple from there, it’s ripe.
Color: The exterior transitions from solid green to yellow-gold, starting at the base and progressing upward. Full golden-yellow color across the majority of the fruit indicates ripeness.
The leaf pull test: Try gently pulling one of the inner leaves of the crown at the top of the fruit. If it pulls out with slight resistance, the fruit is ripe or approaching ripeness. If it pulls out very easily, the fruit may be overripe.
Timing: Typically 4–6 months after flowering begins for homegrown fruit — often slightly smaller than commercial fruit but typically sweeter.
To harvest: Use a sharp knife to cut the fruit stalk 2–3 inches below the fruit base. Your harvest is complete — and the monocarpic cycle described in Section 14 begins.
18. Repotting
Pineapple plants need repotting every 1–2 years as they grow from their initial 6–8 inch establishment pot to the final size they’ll be maintained at.
Final pot size: A mature pineapple plant does well in a 10–14 inch diameter container. Larger pots encourage larger plants and slightly faster growth; smaller pots keep the plant more compact and may accelerate flowering (root restriction, similar to the Bird of Paradise strategy).
When to repot: When roots are visible from drainage holes, or when the plant dries out within 2 days of watering.
How to repot: Gently remove from the current pot, inspect roots (trim any damaged or dead roots), place in new container with fresh pineapple soil mix. Water lightly after repotting.
For complete repotting instructions, see our step-by-step repotting guide. For pot selection guidance including material and drainage considerations, see our best planters and pots guide.
19. Common Pineapple Plant Problems & Solutions
Yellow Leaves
Cause 1 — Overwatering (most common): Soil has been consistently moist. Reduce watering frequency. Check drainage. Cause 2 — Nutrient deficiency: Resume fertilization. Iron deficiency specifically causes interveinal yellowing (yellow between green leaf veins) — use an iron supplement or acidifying fertilizer. Cause 3 — Wrong soil pH: High pH (alkaline soil) prevents nutrient uptake. Test and correct if needed. Cause 4 — Natural aging: Oldest outer leaves naturally yellow as the plant grows. Remove cleanly at the base.
Brown Leaf Tips
Cause: Most commonly fluoride in tap water — pineapples are sensitive to fluoride accumulation in the leaf tips. Fix: Switch to filtered or distilled water. Flush soil periodically to leach accumulated mineral salts. Trim brown tips with scissors following the leaf’s natural angle.
Leaf Center Rot (Rotting at the Growing Point)
The most serious pineapple problem. Rot at the center of the rosette — where new leaves emerge — typically indicates:
- Water sitting in the tank too long without being changed
- Crown damage during initial preparation
- Fungal disease from overwatering
Fix: If caught early, remove all visibly rotted tissue, allow to dry completely, and treat with a diluted copper fungicide. If the growing point itself is rotted (the very center of the rosette), the plant cannot recover — propagate any remaining healthy ratoons.
Failure to Flower After 2+ Years
Cause 1: Insufficient light — the most common reason for indefinite vegetative growth without flowering. Fix: Move to maximum available light or add grow lighting.
Cause 2: Plant not yet mature enough. Fix: Continue care; attempt ethylene treatment once the plant has 15+ leaves.
Cause 3: Temperature too consistent — pineapples sometimes need a slight cool period to trigger natural flowering. Fix: Allow nighttime temperatures to drop slightly (60–65°F) during fall before the ethylene treatment.
Slow Growth
Cause: Usually insufficient light or insufficient fertilization. Fix: Increase light first. If light is already good, ensure consistent foliar and soil fertilization throughout the growing season.
20. Pests on Pineapple Plants
Pineapple plants are susceptible to several common houseplant pests:
Mealybugs
The most common pineapple pest. Pineapple mealybugs (Dysmicoccus brevipes) are specialists on bromeliads and can be difficult to control because they often shelter in the tight spaces between leaf bases in the rosette.
Treatment: Remove visible mealybugs with cotton swabs dipped in rubbing alcohol. Apply diluted neem oil spray to all leaf surfaces — including deep into the central rosette. Repeat every 5–7 days for 6–8 weeks. For the complete elimination protocol, see our mealybugs guide.
Spider Mites
More common in dry indoor conditions. Look for fine webbing and silvery stippling on leaf surfaces.
Treatment: Increase humidity, rinse leaves thoroughly, apply neem oil spray. See our spider mites guide.
Scale
Brown, oval bumps on stems and leaf undersides. Treat with rubbing alcohol swabs and neem oil spray.
21. Outdoor Growing by US Zone
Zones 11–12 (Hawaii, Southern Florida, Puerto Rico)
Pineapple plants are fully perennial outdoors — can be grown in the ground year-round according to USDA Hardiness Zone recommendations. Commercial pineapple production in Hawaii has historically been grown at this zone level. Plants reach their full natural size (3–5 feet tall) and fruit reliably without artificial ethylene treatment. Allow 18–24 months from crown planting to first fruit.
Zone 10 (South Florida, Coastal Southern California, South Texas)
Pineapple plants survive outdoors year-round in protected positions — against south-facing walls, in microclimates sheltered from any occasional cold snaps. Brief temperature dips below 50°F may cause cosmetic leaf damage but rarely kill established plants. Excellent outdoor pineapple growing region.
Zones 8–9 (Pacific Northwest, Southeast, Parts of Texas and California)
Grow pineapples outdoors in containers during the warm season (late spring through early fall). Bring indoors once nighttime temperatures approach 55°F — typically October in most zone 8–9 regions. With careful season extension, outdoor summer growth significantly accelerates the plant compared to permanent indoor growing.
Zones 3–7 (Northern US, Mountain States, Midwest, New England)
Pineapple plants are permanent indoor houseplants in these regions — outdoor growing is impractical except as a very temporary warm-weather patio display. Focus entirely on indoor growing using the light and care system in this guide.
22. Frequently Asked Questions
Q: How long does it take to grow a pineapple from a store-bought top? Approximately 18 months to 3 years from crown rooting to fruit harvest, depending on light conditions and whether you use the ethylene treatment to force early flowering. With excellent light (south-facing window or high-output grow light), consistent fertilization, and ethylene treatment at 12 months, 18 months is achievable. Without ethylene treatment and with average home light, 2–3 years is more realistic.
Q: Can I really grow a pineapple from the top of a grocery store pineapple? Yes — absolutely. The crown (leafy top) of any fresh pineapple contains the plant’s growing point and can be rooted and grown into a full, fruit-producing plant. Follow the complete preparation and rooting process in Section 8.
Q: Is homegrown pineapple edible and does it taste good? Yes on both counts. Homegrown pineapples are completely edible. They tend to be smaller than commercial fruit but often taste sweeter and more intensely flavored than store-bought pineapples because they can ripen fully on the plant rather than being harvested early for shipping.
Q: How often should I water a pineapple plant? When the top 1–2 inches of soil feel dry. In most US home conditions: every 7–10 days in spring and summer, every 10–14 days in fall, every 14–21 days in winter. Pineapple plants are drought-tolerant — underwatering is safer than overwatering.
Q: Why is my pineapple plant not growing? The most common causes: (1) insufficient light — this is the #1 limitation for indoor pineapple growing; (2) winter slow-down — natural during low-light months; (3) just established — newly rooted crowns show minimal above-ground growth for 6–8 weeks while developing roots. Check light first — if you’re not at a south-facing window or under a high-output grow light, this is almost certainly the limiting factor.
Q: Are pineapple plants safe for cats and dogs? The pineapple plant (Ananas comosus) is generally considered non-toxic to cats and dogs per ASPCA records. The edible fruit is safe. Note: the bromelain enzyme in fresh pineapple sap can cause mild skin irritation in some people when handling extensively — wear gloves during extended pruning or working with the leaves, which have sharp serrated edges.
Pineapple Plant Quick-Care Reference
| Factor | Requirement |
|---|---|
| Light | 8+ hours bright direct or indirect; south window ideal |
| Water | When top 1–2 inches dry; also fill tank every 2–3 weeks |
| Soil | Fast-draining; pH 4.5–6.5; cactus mix + perlite |
| Fertilizer | Balanced monthly (soil) + foliar spray every 2–3 weeks |
| Temperature | 68–86°F ideal; never below 50°F |
| Humidity | 40–60%; tolerant of typical US home conditions |
| Repotting | Every 1–2 years; final size 10–14 inch pot |
| Fruiting timeline | 18 months (optimal) to 3 years from crown |
| After fruiting | Mother plant dies; collect ratoon pups |
| Pet Safety | ✅ Generally non-toxic to cats and dogs |
| Difficulty | Easy to moderate — patience is the main requirement |
| Outdoor zones | Perennial in zones 10–12; annual in zones 8–9 |